Translate

Showing posts with label Cold War Commander. Show all posts

Saturday, 22 October 2022

2022 Grimsby Cold War Commanders Game

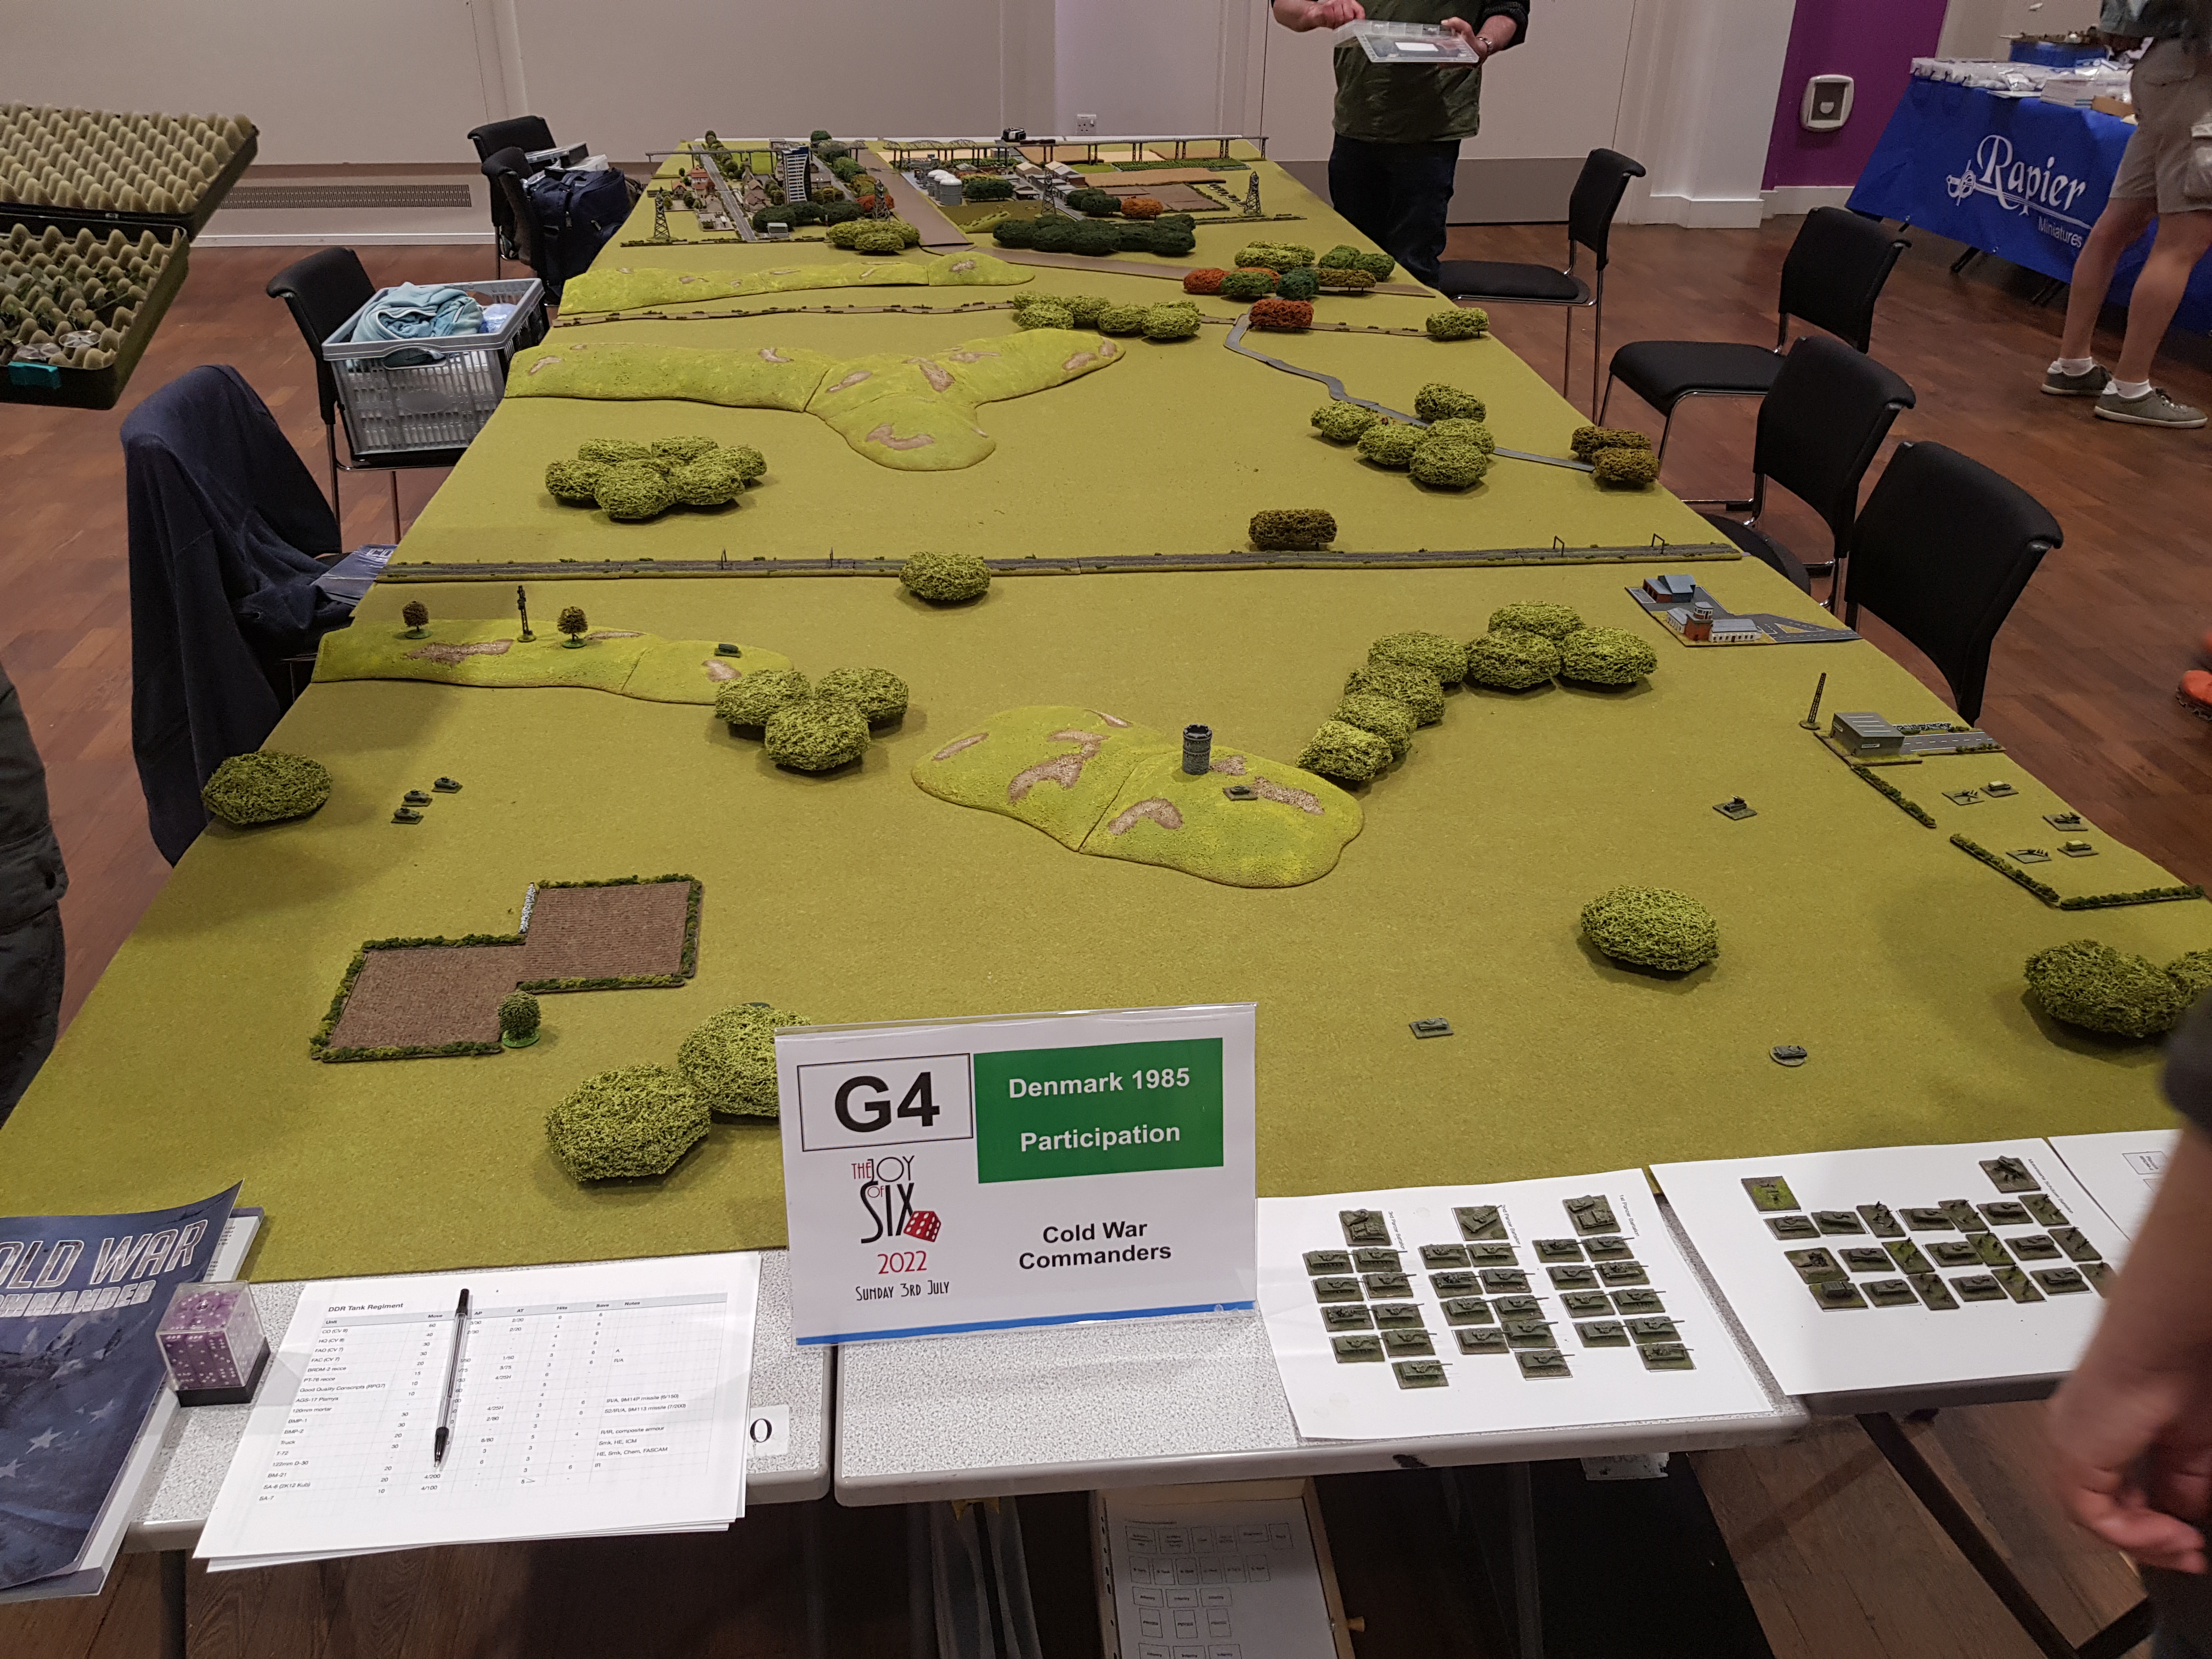
 The weekend of the 7th to 10th October saw those Cold War Commanders who could make it assembling at the Grimsby Wargames Society venue for a mega game of CWC 1.5 (not quite CWC 1 and not quite CWC 2).  It was an opportunity to get my French armor on the table, with a French armored division (really only a reinforced brigade) shared between two players, each getting an armored battalion and a mechanised battalion, with each also getting a uniquely French armoured car battalion mounting the same gun as their bigger tracked AMX-30 chums.  There was also a VAB motorised infantry battalion and another armored car battalion in reserve.

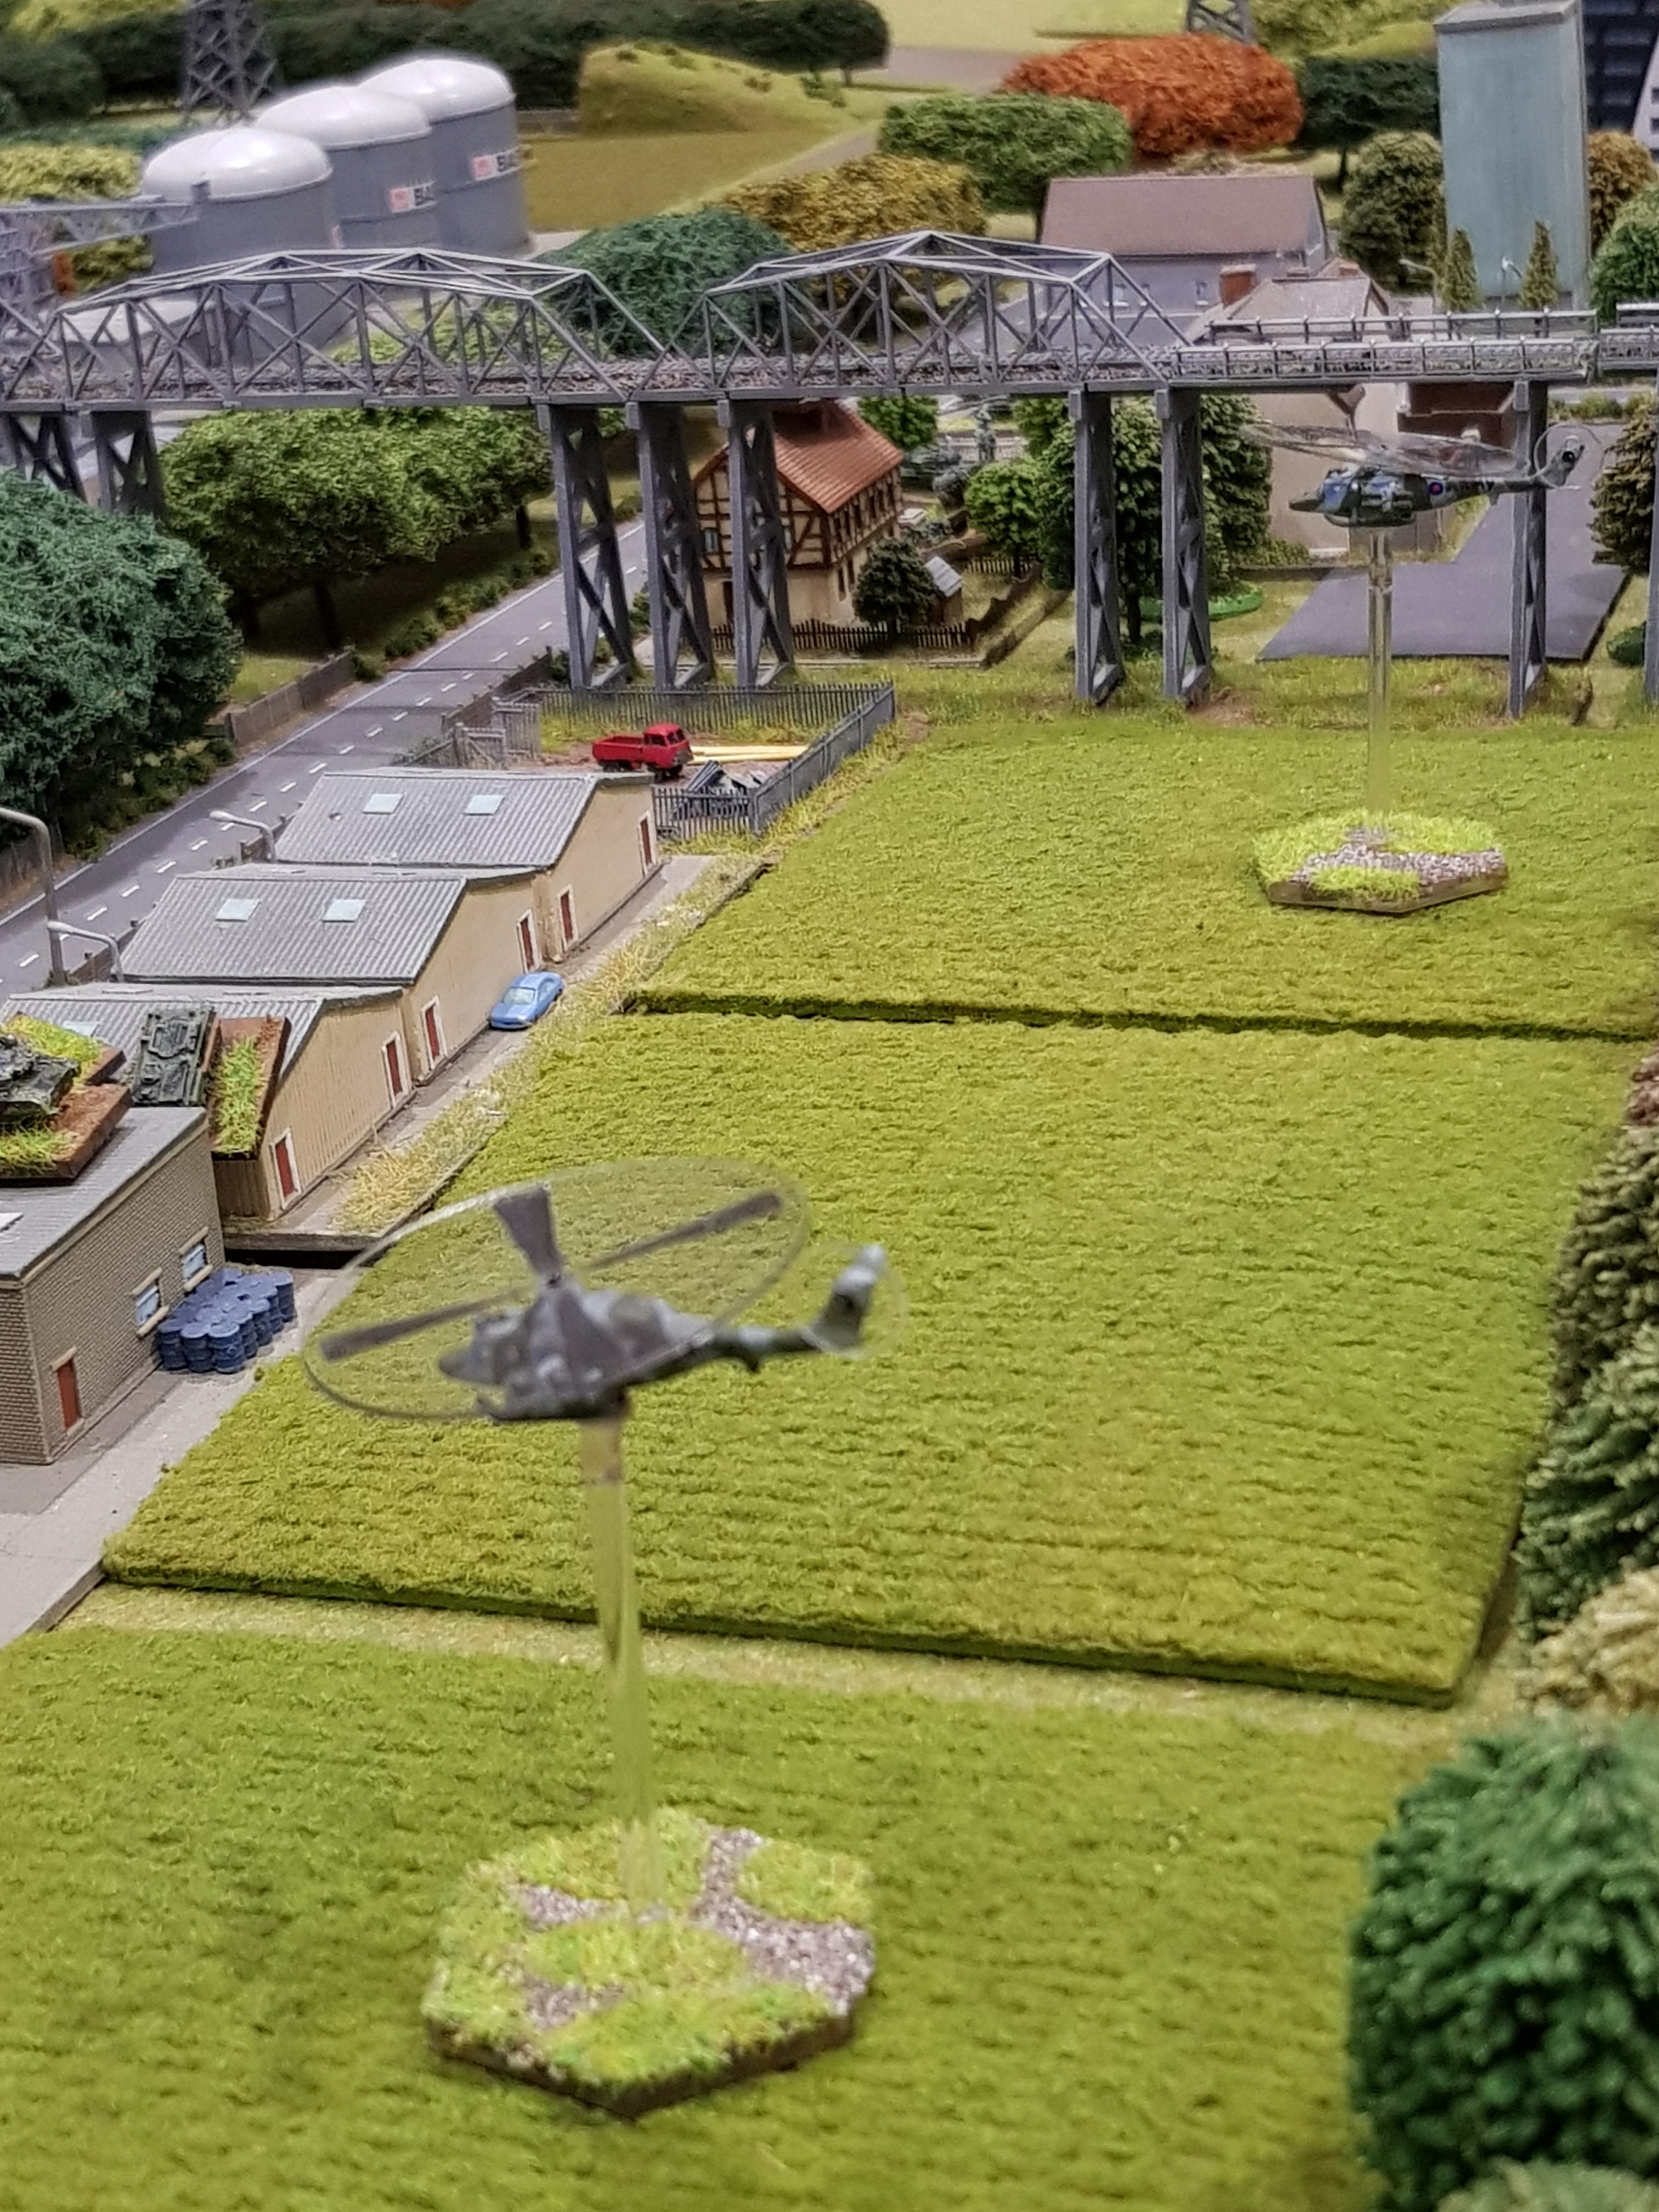
On my left was my French commander, to my right was a light infantry battlegroup of US paratroopers, with some specially airlifted Sheridans in support, betong them a unit of British armor/mechanized infantry and beyond them on the far right a US battlegroup with M1s.  The French were deployed behind a substantial river, with flooded banks.  On the first day of the Warsaw Pact offensive, an East German Motor Rifle batt attempted to fan out on the French side of the river and roll up the defences, but some good initial moves meant the French were able to push into some key wooded areas ahead of the East Germans, who could then make little headway into the ring of French armor, despite using pre-planned smoke as a screen. 


French mechanized infantry on my left flank in contact with French armor to their left - a solid defence against river crossing.


French armor holding trees on the flank of the little town thinly held by the US paratroopers.


East Germans trying to close with the French.


Waves of French coming up in support.


East Germans advance beyond the smoke and are punished by withering French fire.


On the French right, armor and US ATGMs deal with another East German thrust.


River crossing still covered.


Overnight, the French on my left push amphibious mechanized infantry across the river and construct bridging points to allow the heavier armor across. 


The bridging column arrives.


Next morning, the Soviets push infantry and armor forwards to try to pinch out the crossings.


To my front, the French mechanized infantry consolidate their hold on the woods.


On my right, the US infantry look in danger, with a concerted WP effort to push through the boundary between them and the British.  To support, my armored cars moved into the town to form a secure firebase, while the French armor in the woods attempted to shift laterally to the right.  First turn orders weren't too helpful.


Eventually they got moving, just in time as the first Soviet tank brigade (in the far distance) was beginning to see the danger and swing to their right towards the new French menace.


Sheridans slow to get moving as well.


French pushing forwards.


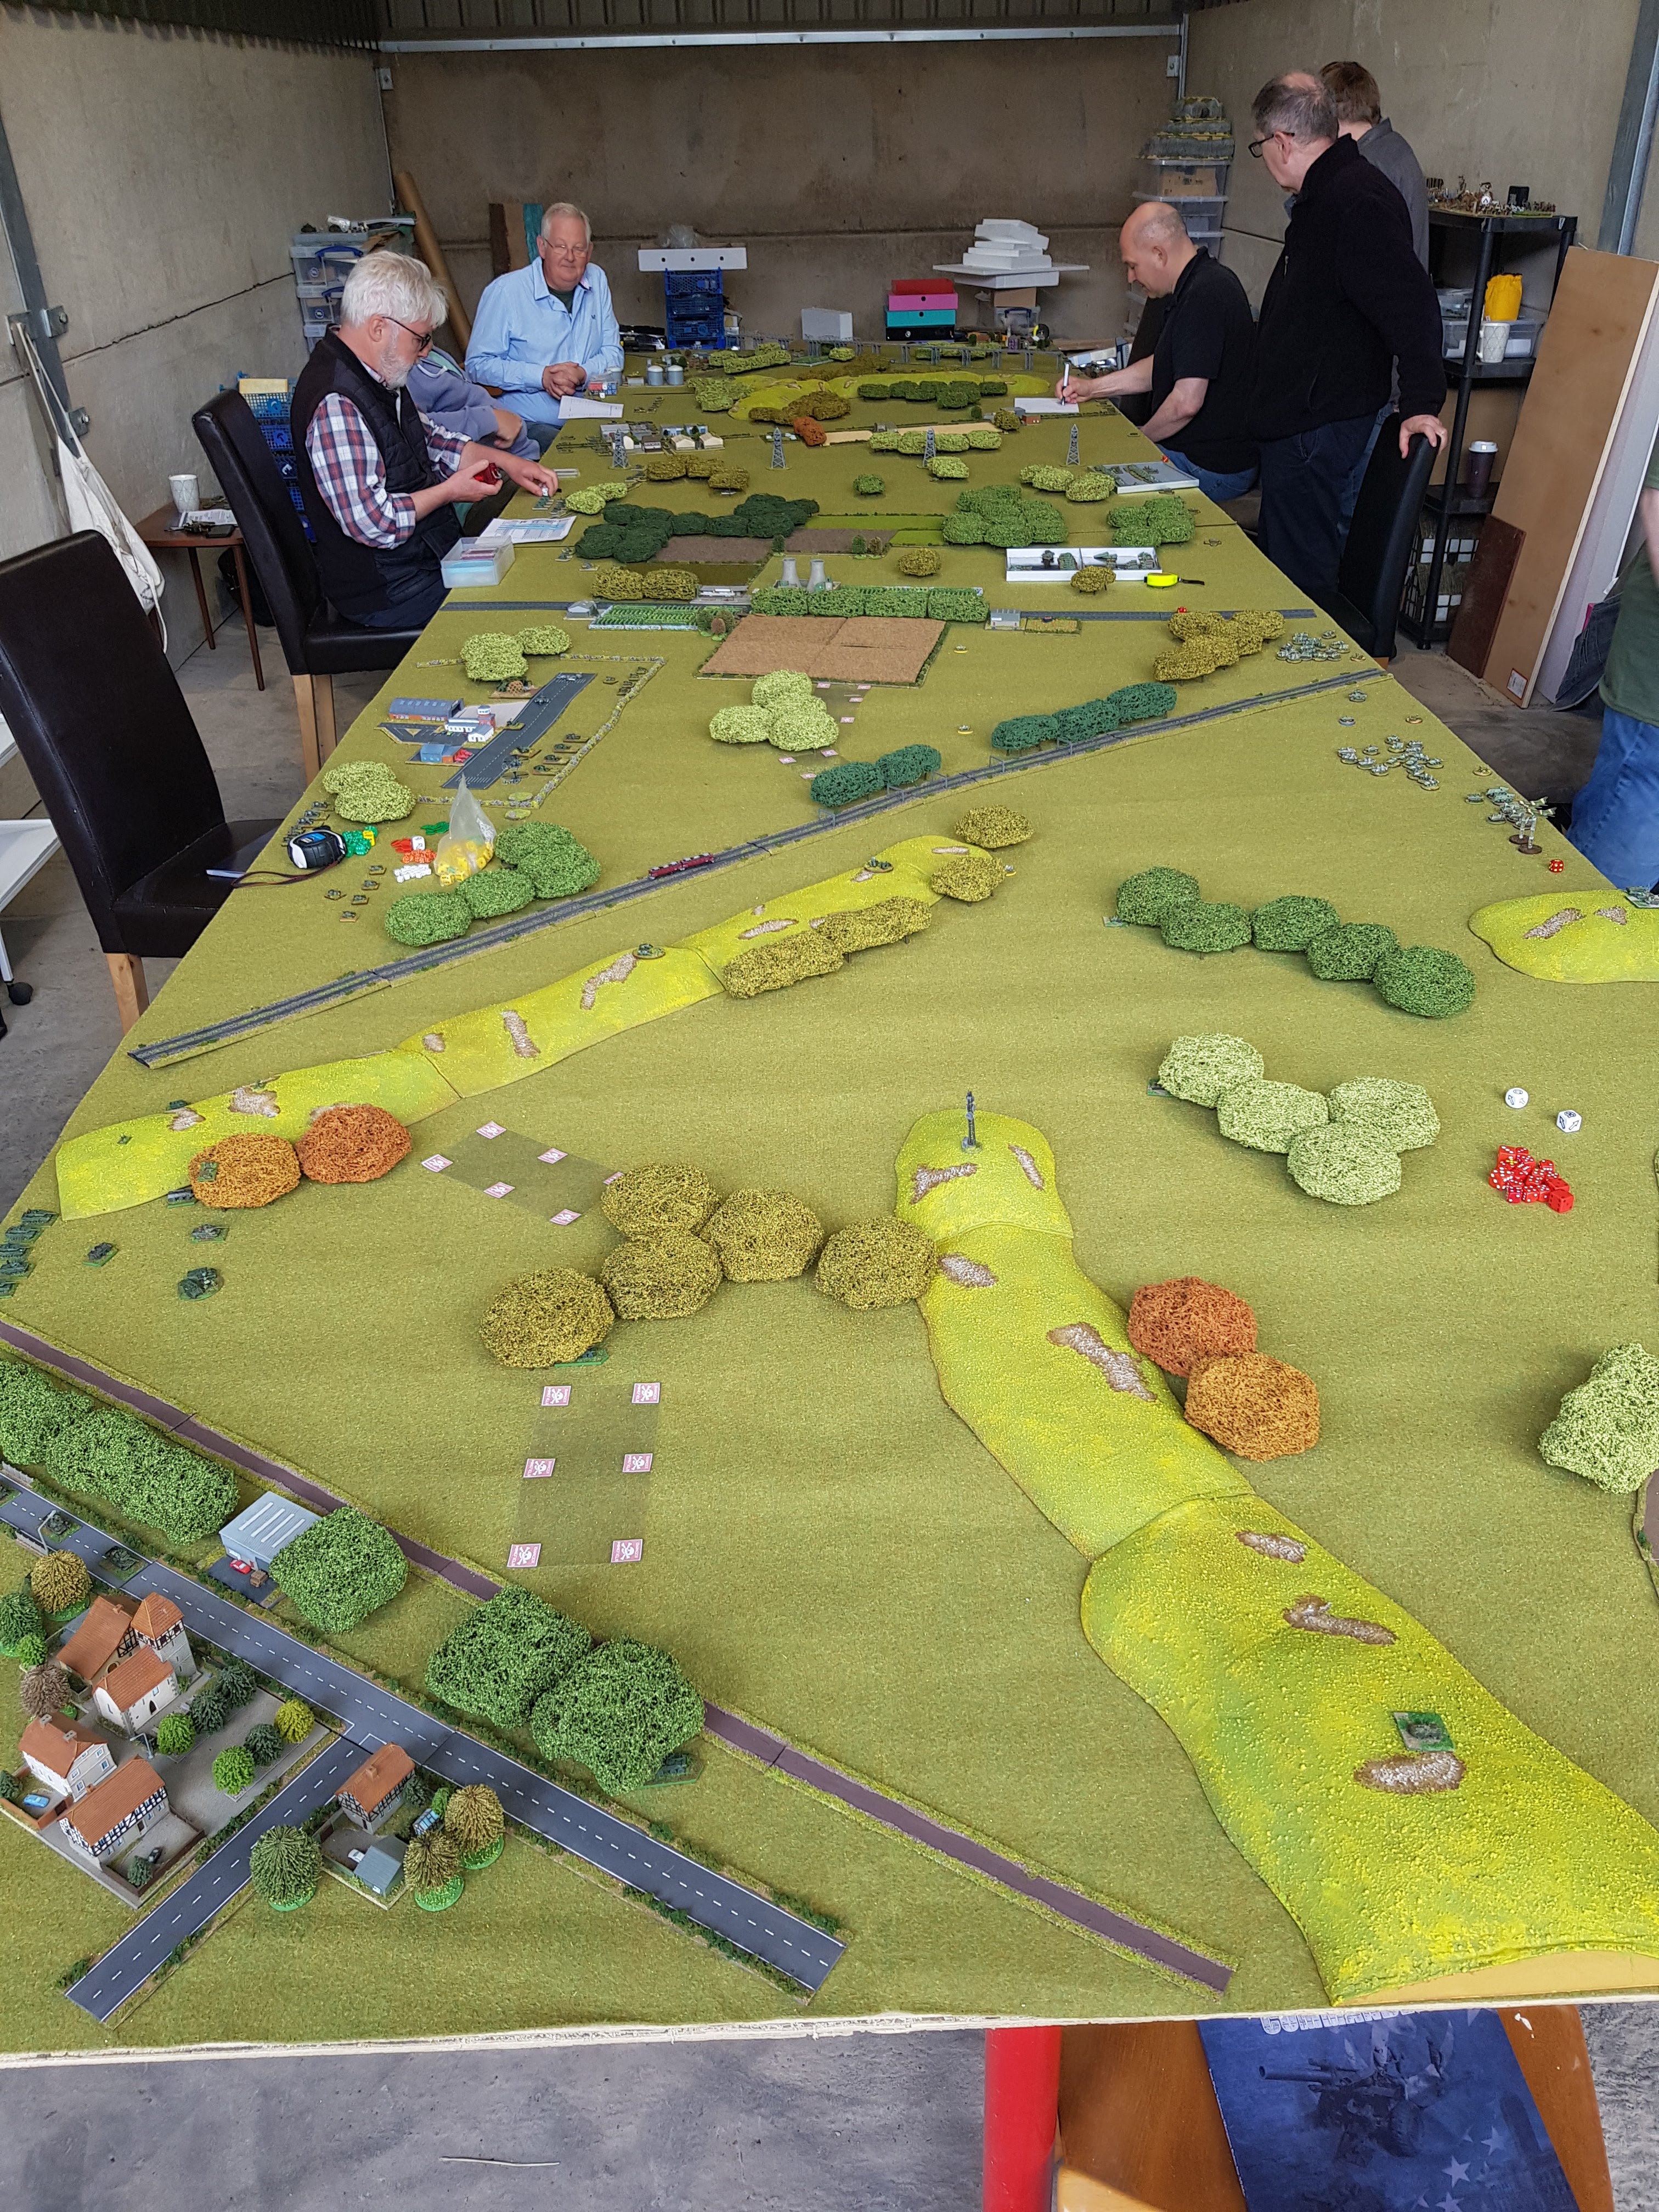
In the excitement of the last couple of turns, I forgot pictures.  The French armour on the right were unable to take up better firing positions in the woods, but were able to put multiple activations of fire into the lead Soviet tank battalion, effectively destroying in.  The second battalion was more canny and from hull down positions on the ridge took out most of the French armor with some long range help from the East Germans.  However, the danger had past and the British and US were able to contain the Soviet push.  But for how long?  Lots of fun, a great weekend with good company, good food and drink and lots of laughs.

Thanks for looking.

Tuesday, 5 July 2022

Cold War Commanders at Joy of 6 2022

 Last Sunday was the Joy of 6 show at Sheffield Hallam University.  We had an early start, crossing the Pennines in the clouds, but descending into a much sunnier Sheffield at 8am.  Set up the table and found a quick bacon bap before 10am opening time.

The table, using the lovely terrain of Richard Phillips.


Looking in the opposite direction.  The table at this end was left deliberately open to encourage visitors to roll some dice and get to grips with the rule system for Cold War Commander 2.


Over on the far left, my British deployed a pair of Lynx attack helicopters and a mixed company/troop of Chieftains and infantry.


In the centre, another mixed company awaits the Soviet horde.


On the right, a Chieftain troop is hiding at the edge of the BUA, ready to deploy into the woods lining the canal when the Soviets get in range.


A pair of Milan firing posts at the bend in the canal cover it to left and right.  An engineer depot is set up at the road junction.


In support three batteries of M109s (actually off table), with a supply dump on the edge of town.


The field hospital is deployed on the edge of town, ready to deal with anticipated casualties.


The CO group deployed on the edge of a wood.


The Harrier hide and resupply area, with a pair of Harrier GR3s about to head off on a mission.


On the far right of the table, an East German tank regiment (bottom) are advancing on a West German mixed tank and infantry battalion group (top). 


More shots of the Harriers.


The tunnel mouth, blocked at the far end by concrete obstacles, behind which a British Scimitar recce sits observing the oncoming Soviets.


Lynx attack helicopters make great deterrents for Soviet tanks and apcs moving in the open.


Not a lot of action at this end of the table.  The Soviet player was deterred by the high density of terrain, which would have greatly slowed his progress.  Instead, we spent a lot of time chatting with visitors to the table about cold war gaming, the rules specifically and the models and terrain making (referring most to Richard Phillips on the Scotia stand for his modelling tips).

All in all a fun day.  Nice to catch up with Heroics and Ros and Andy and Ian looked to be busy, but still have time for a chat, and it was great to see all the old favorites from the 6mm trader world, although it was a pity Leven Miniatures didn't manage to attend.

My own haul for the day was some Battlegroup chits, a pair of Skyraiders and another pair of Thunderchiefs, aircraft weapons loads for Soviets and NATO, a couple of Battlescale buildings and a book on painting miniatures for WW2 desert forces.  Quite restrained really.

Thanks for looking.


Tuesday, 28 June 2022

Cold War Commanders game at The Unit

 Some of the Cold War Commanders ventured into deepest, darkest Staffordshire, to Richard Phillips new gaming venue at Stone, the Unit, situated in a converted barn.

The scenario involved NATO covering forces trying to hold up a Warsaw Pact advance, NATO being allowed a reinforced recce battalion per player and the pact a tank or motor rifle regiment.  All terrain courtesy of Mr Phillips and in 6mm as usual.

My playing area with squadrons of scimitars and scorpions in the fields next to the power plant (centre left), which was garrisoned by my recce infantry platoons in Spartans held in ambush.  Another squadron of scorpions and scimitars is lining the wall around the airport perimeter, as too is a reinforced squadron of Chieftain Mk10s.  A third scimitar/scorpion squadron is lurking in the woods near right, along with the CO and all of the squadrons Strikers.  My opponent, Mark J is bringing his first battalion of BTR-60s with attached T-55s on at the far end.


The whole table, must be 24ft+x5ft.  The Cold War Commanders author, Mark F in blue shirt sitting at the far end on the left.


Turn 3 - my Strikers have somewhat surprised Mark Js first MR batt, taking up firing positions behind the railway embankment and firing as many times as orders permitted, although his third battalion is advancing - behind his hands and rule book, so I'm moving the Chieftains up in support, having lost a Striker to artillery fire.


On the left, Mark's second battalion has made fast progress, so a mixed scorpion and scimitar squadron has moved up to support the other on the edge of the field.


An inquisitive West German recce troop has moved up (right hand edge) to see what all the gun and ATGM fire is about.


Turn 5 and the Chieftains have left the Strikers to deal with Mark's second battalion using long range ATGM fire, while a mixed Scorpion/Scimitar squadron is moving up to mop up the remains of his first battalion.


The Chieftains still have a long way to go to influence the fight on the left flank.  Over on the far left, the ambush was sprung by Chris's T-64s moving on Alan's Belgians and a salvo of IATW scratched two tank platoons.  At the edge of the field, Mark's second batt is trying a combined arms attack and the defending recce squadrons have popped smoke in preparation for a hasty pull back.


Sadly, we had reached the end of the day, with NATOs left flank pulling back in disarray as the Dutch and Belgian contingents were unable to hold.  With the Belgian contingent pulling back, my left flank would have been in trouble as they were already falling back on the airfield perimeter.  Only the West Germans on the right, plus the somewhat devastating Strikers, were still holding out.  This at least in part due to Ian S, the West German opponent, rolling more than his share of 11s as command rolls early on in the game.

Lots of fun and a good try out of Cold War Commander 2.  I'm still not a fan of aircraft hitting on 6s, which makes them rather ineffective for all the trouble they go through to deliver their ordnance and the points cost.  Dedicated ATGM are now well worth the points, particularly when in defence, although the low save and hits mean they are brittle.  Popping smoke as an opportunity reaction to movement or fire was certainly useful as well, both for the defender and, if used well, for the attacker.

Thanks to Richard P for organising the venue and laying on the fish and chips lunch - went down very well.  Thanks to all the players, I think everyone had a good time, I certainly enjoyed myself.

As ever, thanks for looking.


Saturday, 16 October 2021

Cold War Commanders Grimsby Game 2021 Sunday action

 Sunday saw the Soviets regroup for another bite at NATO.  In front of the USMC one BMP battalion withdrew completely, while a second, now reduced to little more than a company) took up concealed positions around fields and hedgerows.


Sea Cobras patrolling aggressively.


The Soviets were still plagued by poor command rolls, which meant their tank battalion eventually moved on table alone.  Intentions were revealed, when it swung away to the west (USMC left flank), but not before TOW-1s and a strike from an A-9 Intruder (10 attacks - reduced to 9 by one unsaved AAA hit) took out half the available armor.  This was a first for the marines and an Intruder strike is something to behold.


Unfortunately, the M60s tried to move laterally from woods on right to those on the left, under cover of a Soviet smoke barrage, but sadly failed a vital command roll and were reduced to one running tank platoon.  Time for the Dragons to earn their keep and two stands can be seen advancing into the woods to bolster up the left flank and support British 1st infantry. 


The empty terrain in front of the marines right flank - oh for some mobile reserves.


Over on the left, the remaining tank and Dragon teams made slow progress, while a follow-up Soviet BMP infantry battalion swings down the road in the distance, heading for the crumbling British defences off screen to the left.


What's left of the Soviet tank battalion and newly arrived BMP battalion still struggling to gain any momentum with poor command rolls.


By the end of play, a combination of long range ATGMs from USMC Tows, Sea Cobras and air strikes from Corsairs, Intruders, and Kriegsmarine Tornados, but mainly poor command roles, meant that the Soviets facing the marines were late to the party (top right in picture below).  However, Steve, the next Soviet player had got to close range and was systematically destroying what was left of British 1st Divisions Chieftain and Milan assets.  Although there could still be some costly engagements with British infantry in the town, it was felt that the Soviets had achieved a breakthrough.  In hindsight, I could have broadened my left flank and taken up some of the pressure on the Brits sooner by moving my infantry into the fields and trees to the right of the view below (2 Dragon teams and an M60 weren't enough), but at leg infantry speeds, could they have moved fast enough?


Sadly, the M60 and Dragons couldn't inflict enough pain on the armor to stop them, although they had been reduced to 50% strength, thanks largely to the Intruder strike.


All in all a great couple of days gaming played with some old and some new friends.  My AAR really only reflects what was happening on the extreme NATO right wing.  Over on the left, Mark's Danes had a torrid time from Andy and Stewart's Soviet Spetsnaz and Marines.  Next to them, Andy's German panzergrenadiers had stood up to severe pressure from repeated suicidal close assaults from Soviet infantry, so much so that their commander Ianski was visited by comrade Makarov on the Saturday night and a new version Ianski 2 appeared on Sunday, only to see his force virtually wiped out again.  Between the Germans and Americans, Chris' British stood up to huge pressure, wiping out the first of Steve's Soviet wave, albeit at great cost in materials if not in infantry, only to be overwhelmed by the Soviet second wave.  The US marines had kept Martin's Soviets at arms length on day 1 and reduced the effectiveness of 2 BMP battalions to a single company, mainly due to command rolls preventing the Soviets from getting going.  Martin's Soviets eventually made it to support Steve's attack on the Brits and I didn't move enough strength soon enough to be able to support the British.

Loads of fun, some cracking banter, good food and a few beers.  In total I think it was 11 game turns played, which says a lot about the players (new players picked up the mechanics really quickly) and the spirit the game was played in, but also the restriction of forces to brigades (or parts of) with suitable supports.