Translate

Showing posts with label Setting the East Ablaze. Show all posts

Friday, 22 October 2021

Setting the East Ablaze Dunsterforce game

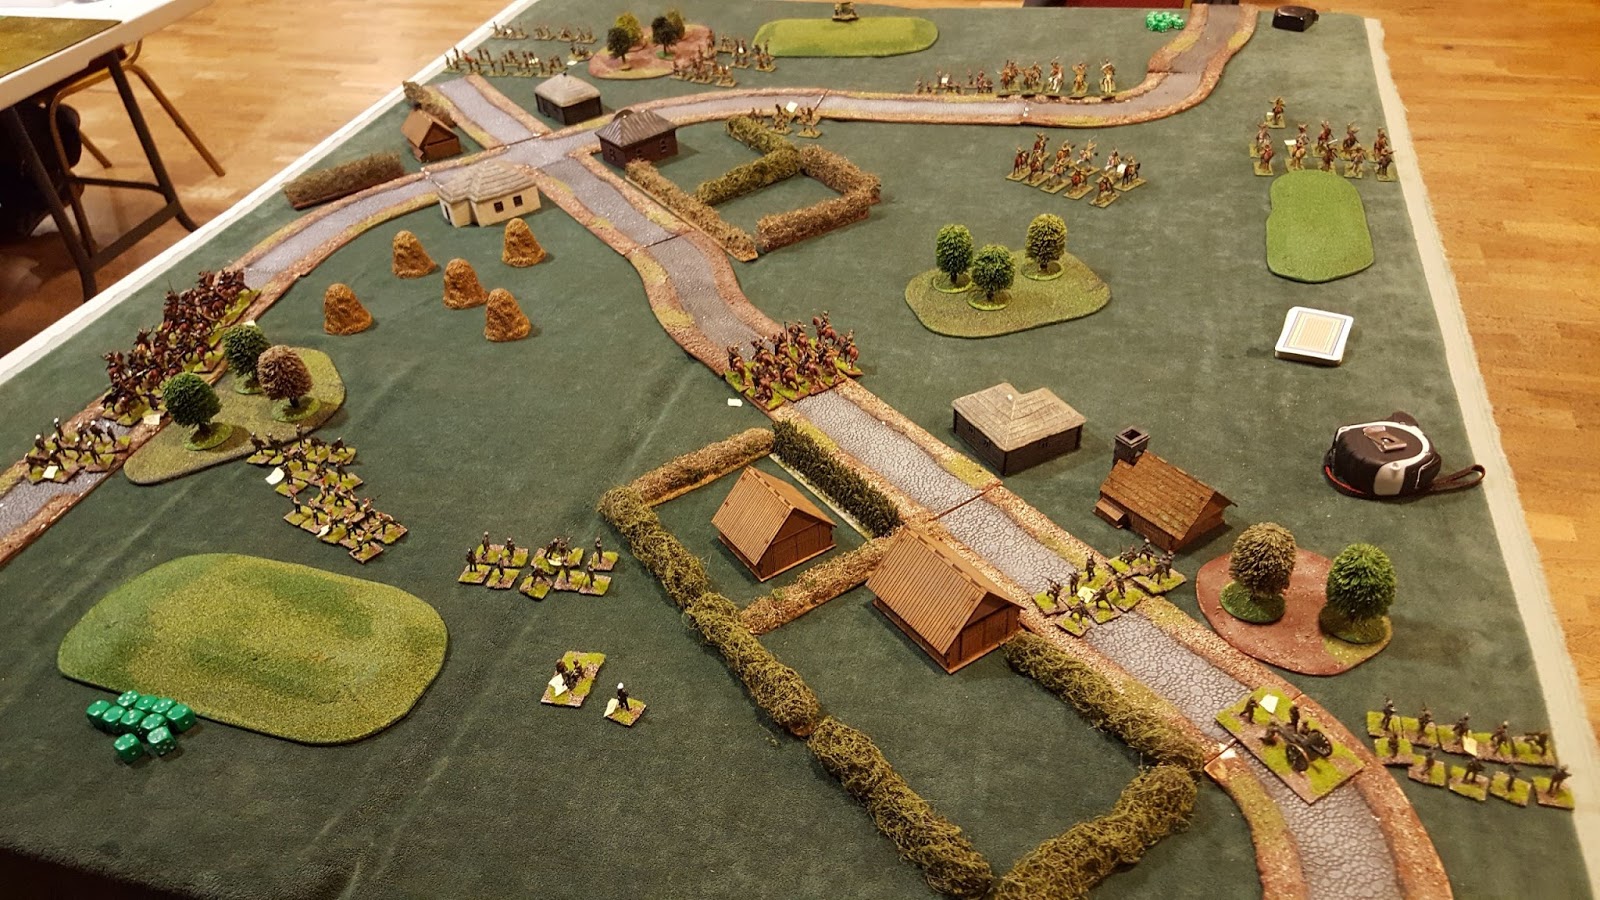
Will, Ian, Andrew and I played out a game of Setting the East Ablaze at the club last night.  We opted for scenario 1 from the Adventures of Dunsterforce Supplement, with the British sending an Indian Army force northwards through Persia in an attempt to head off an Ottoman army heading for Baku and its' oilfields.  A large game, 8 units of Cossack infantry, 2 of Cossack cavalry and a unit of British Hussars, supported by HMGs and mountain guns and a Martinsyde ground attack aircraft, taking on 12 large units of Jungali irregulars, supported by HMGs.  Dunsterforce entered on the road to the left of the photo below and had to skirt or go over the ridge in the foreground, to reach the bridge and cut off the Jungali retreat/reserves.  Troops and terrain are all from Will's collection.


Detail of the river and crossing (totally unlike the real bridge) with chopped up matting representing scrub along the river banks and at the foot of the stone scattered ridge.


The Jungalis or Junglies as British troops referred to them, dug into shallow trenches and rifle pits on the banks of the river and took to ground in the scrubby areas and amongst the rocks on the ridge (hidden from British airpower).


Said British air power, here a Spowith Camel, representing a flight of 2 Martinsyde aircraft.


View from the Martinsyde at the end of turn 1.  The combined Cossacks and tiny British contingent are advancing either side of the road, mounted Cossacks and British armoured cars advancing around the Tea House near the curve in the road.  Cossack infantry form a densely bunched mass attempting to push up onto the ridge.  The Jungalis have triggered their ambushes, with one spectacularly successful ambush routing a Cossack infantry unit (dead are piled on the hilltop lower left).  Jungali reserves pile over the bridge (lower right) to form a conveyor belt feeding fresh natives onto the ridge to hold off the Cossacks.


Jungalis facing the stiff upper lip of dismounted Hussars, bolstered by a Lewis LMG.


The Cossacks still bunched up.  The two chaps in front of their main body are routing.


After a second round of play, another Cossack infantry unit has broken on the run up the hill.  However, Jungali ranks on the hill top have been spread thin, but help is on the way as reserves are fed forwards.


A big Jungali highpoint was almost wiping out the British Hussars, although they managed to pass all but one morale test, leaving them pinned.  The British armoured cars were determined to wipe out the Jungali HMG team at the end of the ridge.


Cossack mountain artillery pounded the Jungalis on the ridge nearest the camera, thinning them out considerably, but they were holding on for now.


This was a very large scenario and we were very ambitious trying it out in an evening.  However, it did let us practice using a variety of troop types, as well as artillery, airplanes and armoured cars.  The scenario looks to be a tough nut to crack for the British/Cossack forces and the Jungalis were holding their own at the end having done for 2 units of Cossack infantry and the British Hussars.  Still some questions to iron out in the rules and need to get more familiar with the rules, but lots of potential and a fun and attractive looking game.


Thanks for looking.

Tuesday, 19 May 2020

20mm WW1 Bengal Lancers (lockdown 10)

For a bit of variety from WW2, I dug out a box of Hat Colonial era Bengal Lancers.  Comparing pictures of WW1 Indian Lancers from Mark Hargreaves book on painting WW1 British, Dominion and Indian figures, there was little difference between the colonial era and WW1 era troops and at this scale, I figured I could get away with it.

I largely followed the paint recipes in the book, although decided I wanted to give them the dress puggree/turban, to make them more colourful to stand out on the tabletop.


Close up of the commander and a couple of lancers charging with lances levelled.


From behind - I could find no images of the neck covering part of the pugree, so followed a similar pattern to that on the front of the puggree/turban.  I added some old gold as a fringe at the bottom, although this may have been reserved for officers and other ranks may have had to make do with a white or some other light coloured fringe.


These figures from Hat are made in their soft, bendy plastic, but I found them to be easy to work with.  The soft plastic made it easy to cut away the hilt and guard of the sheathed sword on the officer with sword drawn, as well as the butt of the rifle protruding from the rifle bucket of the two rifle armed troopers.  The bamboo lances don't appear to be significantly bent out of shape, although the very long upright lances mean I have to use a double height storage box to avoid crushing them.  I might add some pennants to the lances at some time, to give some more colour, although they weren't used on active service, so I guess these are more realistic for combat.

These should be useful for early 20th Century operations in the NW Frontier, East Persian cordon, Mesopotamia, Palestine and even on the Western Front, although deployment of mounted lancers in Flanders would have been unlikely in the extreme.  They will also be great for what ifs, such as allied intervention forces in the Russian Civil War for Setting the East Ablaze and may even pop up in the fictional Black Sea country of Andreivia at some point.

Thanks for looking. 

Friday, 2 March 2018

Setting the East Ablaze

A couple of weeks back, Will and I tried out Setting the East Ablaze.  I picked up a copy at Vapnartak at the start of the month, so we gave it a go.  I'd only managed a brief read through before playing, so we were fumbling around a lot trying to work out some of the mechanics.  However, it was a fun game and I really like the period - not just the historical options, such as Reds vs Whites, Reds vs Ukrainians, Reds vs Central Asian kingdoms, Russo-Polish, Russo-Finnish, Czech Legion, Greece-Turkey, etc, but the what ifs, such as Allied intervention in the RCW, Turkey, Red invasion of India, Red invasion of Germany - all interesting settings.

Because we were learning the rule set, I don't really have a coherent after action report, but the table looked great.  We played a meeting engagement between Will's plucky Reds and my stalwart Whites, the photo below showing the situation at the end of turn 1 from the White end of the table.


The Whites were as keen as mustard on the left flank, but more reluctant on the right, but not so my newly painted unit of Strelets WW1 Russian Hussars, who merrily cantered along the road, despite the proximity of all those Red Cavalry in the Budinovkas.


The Red Cavalry were getting too close to the White Hussars for comfort.


But being death or glory boys, they took the Reds head on in a charge.


A rather self-immolating charge.


The Whites on the left reached the village at the same time as the Red infantry.


A furious exchange of ineffective shooting, slowly whittling away both Red and White, but then the Reds had more infantry to hand.


The costly melee goes on, with the Hussars taking serious losses, albeit inflicting damaging losses on the Reds, but then they have two more units nearby.


A fun game.  I think I was out manoeuvred in the early stages and never really caught up.  Still lots to discover about the rules,. but quite a nice effect caused by the randomness of card activations.

Cheers, Andy