Translate

Wednesday, 9 October 2013

More Adler ACW

I've just finished basing another Adler 6mm ACW unit.  The pose this time is infantry advancing with shouldered arms.  I've used the same numbers of figures per stand as the previous unit and think they look quite good.

The unit in line formation.

The command stand.


A regular stand.
 The other regular stand.
 The unit in column.

 
The command stands still need flags added, but I'm going to give them a couple more days for the PVA glue to cure thoroughly before I start adding the flags - I've learned to my cost that unless the glue is really set, when the flags are stuck on it is easy to dislodge the figures.

Thanks for looking.

Sunday, 6 October 2013

Rapid fire Corinth Canal AAR

I played Will at the Defenders club on Thursday, using Rapid-Fire rules.  Will had played the Corinth Canal scenario some while ago and still had all the forces, so that's what we opted for.  As Will had played the Allies previously, we agreed he would command the fallschirmjaeger.  We played on a 7.5x6 foot table with the Corinth canal running down the centre of the table, as per the scenario from the Rapid-fire site (http://www.rapid-fire-uk.com/300/corinth-canal/?osCsid).

The Germans start with 2 companies of glider landed engineers at the bridge and then they select two landing zones either side of the canal.  Then the Allies deploy - a Greek battalion in Corinth town and a New Zealand Infantry battalion anywhere more than 20 inches from the bridge on the northern side.  I chose to deploy the New Zealand battalion in an arc facing the bridge at the 20 inch deployment limit.  One bofors battery was deployed with the New Zealanders and one on the hill outside Corinth.

When the German paratroopers landed, they chose the open area on the other side of the hill from Corinth for one battalion, where the troopers landed in a relatively tightly compact group, loosing one figure to bofors reserved fire, and immediately opened small arms and grenade attacks on the bofors gun in response, neutralising 2 crew.  The other battalion landed immediately in front of, or around the New Zealanders.  Reserve bofors fire removed three figures, while small arms and grenade attacks removed 1 bofors crewman, one MMG crewman and one figure from one of the dug in companies.  In reply, the Greeks moved out of Corinth at top speed heading for the crest of the hill, while a reserve Kiwi carrier platoon waited at the board edge to see what would happen next.  The Kiwis on the other side of the canal immediately got stuck in to the paratroopers, inflicting at least 10 casualties, while the mortar opened fire on the engineers, inflicting a casualty on the group on the nearside.  Thus ended Turn 1, with the paratroopers facing the Kiwis already in a pickle and an epic confrontation about to erupt on the outskirts of Corinth between a regular Greek battalion, supported by a Kiwi carrier platoon and the other paratrooper battalion.

Turn 2 saw the paratroopers consolidate on their canisters and open up with all they had on the Kiwis, silencing the bofors and the MMG, but not achieving much against the dug in infantry.  The PAK36 scooted across the bridge and took up position on the Corinth side.  The engineers advanced towards the Kiwis to cut off a Kiwi company advancing through the nearby woods.  Over on the Corinth side, the paratroopers consolidated on their canisters and removed another bofors crewman.  In reply, the Greeks advanced into sight of the paratroopers while the Kiwi carriers skirted the base of the hill and came up on the paratroopers flank, making sure to keep out of sight of the PAK36.  The Greeks silenced another handful of paratroopers.  The Kiwis on the other side of the canal kept up withering fire on the other paratrooper battalion, whittling numbers down to a first morale test.  Despite their elite status, a pinned down result meant they were keeping their heads down.

In turn 3, a Stuka flight appeared over Corinth and dive bombed the Greeks on the hill - to no effect.  In the firefight on the hill, the Greeks lost 8 or so figures, while the paratroopers occupied the bofors position.  On the other side of the canal, the pinned paratroopers inflicted very few loses on the Kiwis, although the engineers flamethrower removed 5 figures from the Kiwis in the woods.  The Allies continued the fight on the hill, inflicting additional paratrooper casualties.  To the north, 2 Vickers MkIV tanks appeared and advanced to within close range of the paratroopers around the bofors, while the Kiwis opened up with everything they had.  The Kiwi 3" and 2" mortars fired on the engineers, eliminating all but the flamethrower in the first company.  Surprisingly, the pinned paratroopers rallied.

Turn 4 saw the Stuka successfully bomb a Greek company, causing 3 casualties while the ongoing firefight took the Greeks to within 2 figures of a morale test.  On the other side of the canal, the flamethrower, now consolidated with the second company, flamed the last of the Kiwis in the woods.  The PAK 36 by the bridge inflicted heavy damage on one of the MkVIs.  In response, the Greeks and Kiwi carriers kept causing losses on the paratroopers on the hill, while the Kiwi battalion on the other side caused further casualties to the engineers and surviving paratroopers, with one company advancing to close the range on the occupied bofors position.

Turn 5 was the decider.  Further losses to the Greeks forced a morale test, which they passed with no offensive action.  The Stuka attacked the MkVIs with no effect and then left the table having used all its armament.  The battalion HQ company of the Kiwis took some minor losses to the paratroopers.  Outside Corinth, a reserve of lorried Kiwi infantry arrived and headed towards the hill to join the firefight.  The Greeks and Kiwi carriers inflicted more losses on the paratroopers.  The MkVIs advanced to just short of the bridge and fired on the PAK 36 to no effect.  However, the Kiwis caused losses to the paratroopers and engineers causing morale tests.  In the resultant checks, the paratroopers had had enough and began putting their hands up and emerging from their positions.  The engineers kept in the fight but with less than a company left, were in no condition to carry on the fight.  At this point, the bridge exploded, presumably the demolition charges had been hit by MkVI fire and the whole lot had gone up. This meant the Germans could not achieve any of their objectives and the game was effectively over.

All in all, I found this a really enjoyable game.  The confusion of the paratroopers landing on top of a deployed Kiwi battalion was the highlight for me, as the game could have gone either way at that point.  Some better assault die roles for the paratroopers in the first turn and the Kiwis would have been in a lot more trouble.  The landings against the Greeks were more successful initially, but the Greeks resolute advance and attrition kept them occupied throughout the game.  The Stuka attacks also weren't too effective and again the outcome might have been different if the Greeks had taken more casualties in the early stages.

Thanks to Will for supplying the figures, scenery and for a most enjoyable game.  Thanks to you too for looking.

Saturday, 5 October 2013

ACW 6mm figures comparison of Baccus and Adler

Following the success of the bring and buy purchase at the Donnington Park show, I had a go at painting up a unit of infantry.  To get a feel for what they were like to paint up, I did a unit of Baccus figures using the same techniques.

Both units based, Adler at the front, Bacus behind.  The Baccus figures are based 4 to a strip and they stand shoulder to shoulder facing the same direction.  Once painted, these can be stuck to the base as a block forming a nice regular formed infantry block (2 ranks of 8).  The Adler figures are based in strips of four but they face along the strip front to back so need to be cut individually and stuck down.  I figured the most my fingers could cope with was 6 figures to a rank, so I painted up 8 strips (32 figures) and based them with 11 figures (6 front rank and 5 rear rank) on a normal base and 10 on a command base (5 command front rank, 5 rear rank).  This gives a more open order, but still a regular appearance.  I think this works fine for ACW infantry as I understand they were much less close order than their Napoleonic forebears.  For Nap's, I would want to be able to base them much more closely, shoulder to shoulder, which I think Adler do for this range.

Comparison of the Baccus command stand (left) and Adler stand (right).

Comparison of Baccus infantry stand left and Adler stand (right).

The complete units in column, to confuse things, Adler on the left and Baccus on the right.
 
 
In summary, I like both types of figure.  Baccus has some really nice detail, with details like webbing really easy to see, especially once base coated.  The Adler figures have much less well defined detail, with almost no sign of webbing on the figures that I painted.  However, both can be painted nicely and to a similar standard/style.  The Adler figures are slightly larger, especially the heads, but once painted and viewed as a unit I don't really notice the difference.  One thing the Adler figures do offer though is a much greater variety of poses - there were at least six different poses for figures in brimmed hats, plus at least the same again in kepis.  Add to that some with packs or blanket rolls and some without and there are a vast array of different looks that can be achieved for a unit, including the typical rebel unit appearance with everybody doing their own thing.  Baccus infantry also has a lot of variety with a mix of blanket rolls and those without, plus lots of different types of facial hair, and hats and kepis are mixed in the strips, even differences in stature, but the strips comprise about three of four different basic types, so the choice and final unit is quite uniform.  I'm quite happy to mix both types in the same army, though not in the same unit or base, as this should give a good mix of variety (Adler units) and uniformity (Baccus units).  I do think the Baccus figures are easier to paint because of the raised detail, but the Adler figures weren't that difficult either.
 
 
As ever, thanks for looking.

Tuesday, 1 October 2013

Current projects

Well, I went to the World Wargames Show at Castle Donnington on Saturday and had a great time.  Met up with quite a few friends, saw some great games, perused the traders stands and picked up some toys.

I had a plan of sorts and picked up enough 20mm Fallshirmjaeger figures from SHQ to complete my early war brigade for Rapid-Fire.  All I need now are three Zvezda PAK36 AT guns and some rudimentary conversions of my Airfix Fallshirmjaeger figures to act as crew.  I also picked up a set of Adler British infantry packs, enough to kit out another brigade for BKCII.

In an effort to assuage my guilt over playing so often with Will's ACW plastics, I also picked up a pack each of IMEX confederate cavalry and Italeri confederate infantry in 20mm.  Not a lot by his standards, but enough for me to try out painting them to see what sort of job I make of it.

On the bring and buy, I picked up sets of nicely painted 6mm Napolenic French, British and Brunswickers, enough for a couple of brigades for each country for BP using the same three stand per regiment basing as our ACW figures.  I was also fortunate enough to pick up over 2 kilos weight of Adler ACW figures, which I'm in the process of sorting out, but I reckon there are enough figures for a division of confederate infantry and double that of union, c. 20+ artillery pieces and crews and 3 or 4 cavalry regts per side, plus assorted horseholders, skirmishers/dismounted cavalry and mounted officers.  Then I struck gold dust, picking up a box of assorted mid-war German armour by GHQ, the equivalent of at least 15 full packs - a real bargain.

Timecast had some great new terrain out including new 6mm ACW and modern buildings - the 6mm Office Block is really nice but will take some thinking about in terms of how to paint it. The Baggage Train had some nice additions to their 6mm Atlantic Wall fortifications with quite a bit more in the pipeline, so looking forward to seeing them when they are ready.

I also impulse purchased a book "Intervention in Russia 1918-1920 A cautionary tale" by Miles Hudson.  Published back in 2004, I missed this volume when it came out.  So far I've read the first couple of chapters and already feel that I know a lot more about the period than I did before.  It has helped to explain a question I always meant to find out, why many of the Great War memorials in Britain's towns and cities refer to the Great War 1914-1919, when we all know the armistice was signed in 1918.  This included the Roll of \Honour on the wall in the assembly hall of my old school, where two "Old Boys" were recorded as dying in 1919.  I think there may be an element of pedantry as the Treaty of Versailles wasn't signed until 1919, but the fighting and dying by British, French, US, Australians, Canadians, Italians, Japanese, Czech, German, Austrian, Turkish, Polish and Russian soldiers didn't come to an end until 1919, for most countries although the Russian Civil War persisted until 1922.

I also had some luck on e-bay recently, picking up the best part of a CWC BTR Motor Rifle Regt in 6mm and 100+ modern 15mm infantry to go with the vehicles I've picked up from Poundstretcher as the makings of a Sci-Fi force for Tomorrow's War or FWC.  At the end of the summer I did some trading of models for the basis of a 6mm 1980's French armoured force and I've placed a big order with Heroics and Ros for vehicles to complete my Early war German armour and 21st Panzer Div battlegroups for D-day.

So, all in all a lot of unpainted lead.  However, through the winter I am to finish my 20mm Rapid-Fire Fallschirmjaeger brigade, 6mm BKCII D-day forces for Sword Beach, 6mm CWC 1980's French armoured battlegroup, 6mm CWC 1980's Soviet Motor Rifle Regiment, 15mm Sci-Fi army and 20mm ACW plastic test figures.  Whether I get them all complete remains to be seen, but I can start with the best of intentions.

I'm afraid I don't have much to show for the week just gone as, apart from spending money at shows, we've been getting the kitchen decorated so all my gear has been isolated by the clearance from the kitchen.  Getting back to normal now so hope to be back to the painting table soon.  I'm beginning to get withdrawal symptoms!!

Thanks for looking.

Sunday, 22 September 2013

D day fortifications in 6mm part 3

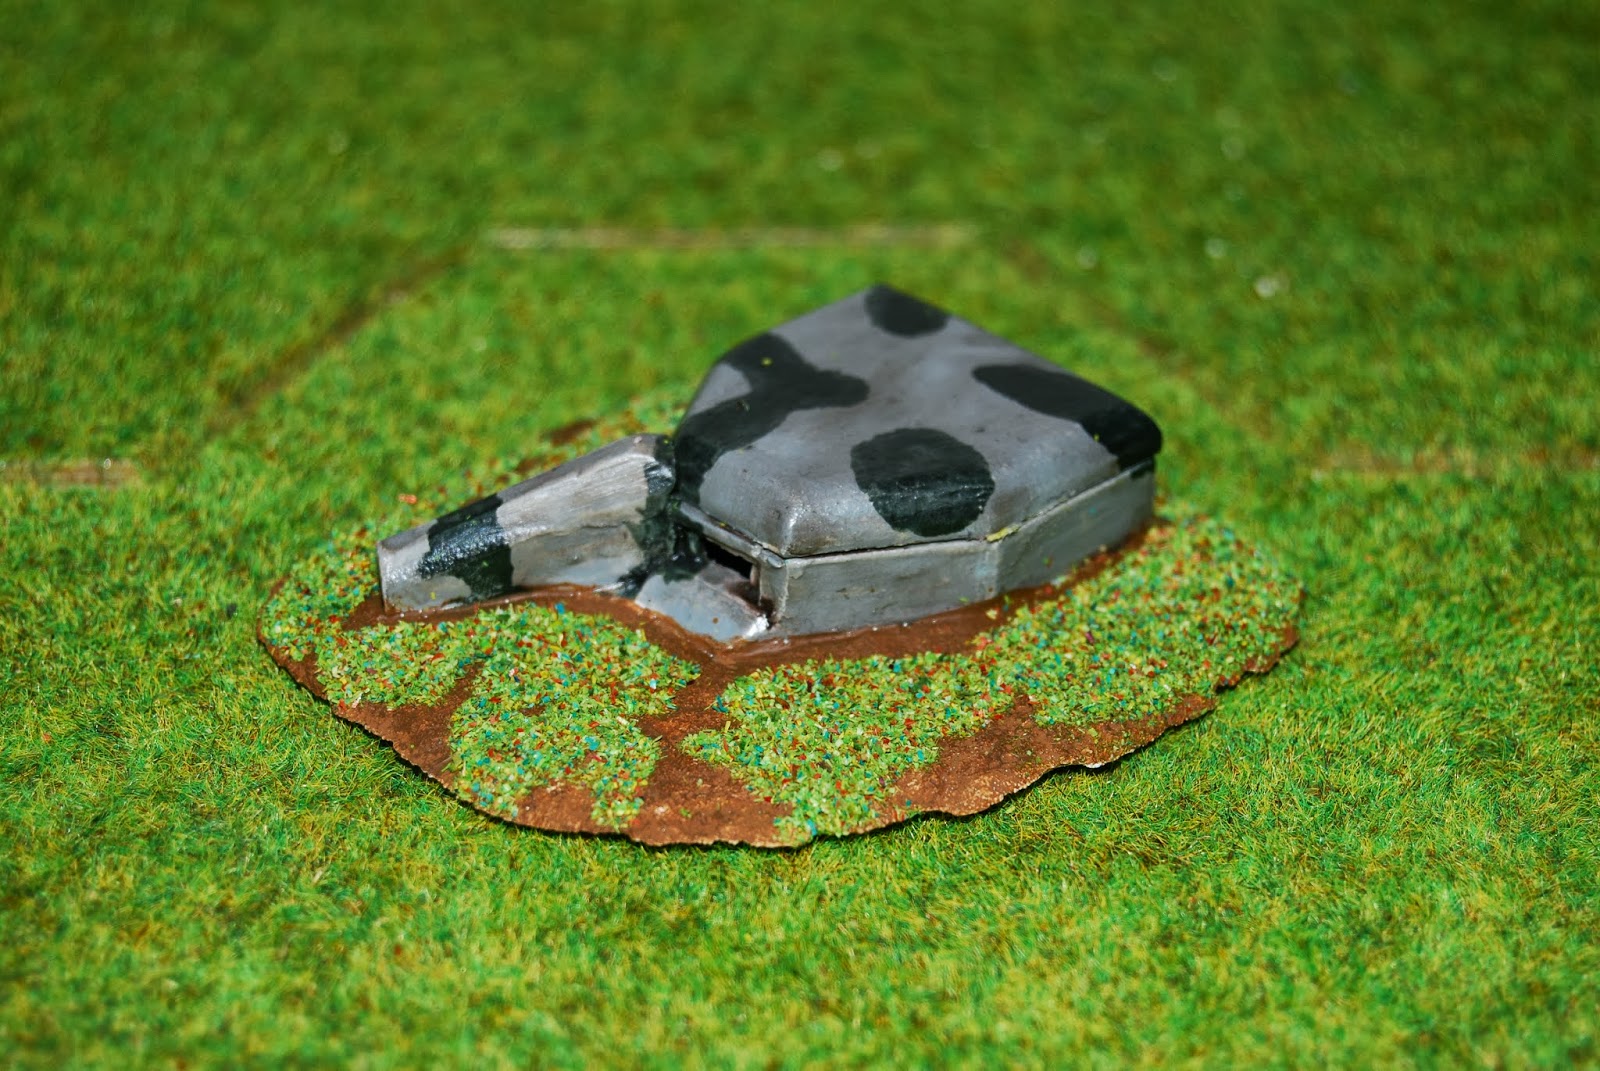
Added some more models today.  Here we have an artillery observation tower, based I think on the example at Ouistreham in Normandy - I can't find this on the Baggage Train site, so guess it must be new, together with a couple of R667 50mm AT bunkers with left and right enfilade walls respectively.

The observation bunker from the front.  Space on the top for an AA gun, I'm thinking either single or quad 20mm AA gun.
And from the rear.  The underground entrance on the right is covered by an MG position under the concrete lintel at the far end.  A tough nut to crack.
A left enfilade R667 50mm AT bunker.
The right enfilade version.
Detail of the rear of the bunker, same for both models, showing the rear blast wall, which prevents direct fire at the rear entrance to the bunker.

Just got the sea wall sections to finish off, but there are a lot of them, almost a metre in length on the table top, so about enough to stretch from La Breche to Lion sur Mer in 6mm.

Thanks for looking!

Saturday, 21 September 2013

D day fortifications in 6mm part 2

Just finished flocking these, so without further ado, here they are.

Open artillery casements - being replaced by fully enclosed artillery bunkers on D-day as the artillery pieces and crews are pretty exposed to naval pre-programmed or counterbattery fire in these positions.
 An open casement with French 155mm artillery piece for scale.
 An M262a artillery observation command fire control bunker.

 An H669 right enfilade garage bunker, viewed from the sea side.
 The business end of the H669 bunker.
 Another H669 garage bunker, this time a left enfilade version viewed from the land side.

Thanks for looking.

D day fortifications in 6mm

I'm in the process of finishing the flocking on some D-day fortifications that I bought from The Baggage Train at the Gauntlet shows back in 2012 and 2013.  I'm getting these ready for a Sword Beach game we're thinking of laying on in November, and of course, the 70th anniversary is next June, just ahead of the 100th anniversary of the outbreak of the Great War.

This is, I think, the two part bunker for 20mm AA gun.  I'm planning on mounting a quad 20mm gun in the firing platform.


This is the R622 infantry bunker - I'm thinking of using this for the core of the Hillman bunker complex - for BKCII it should form a large bunker with capacity for a HQ and a couple of infantry stands.


Still working on some AT bunkers, artillery pits and bunkers, observation bunkers and some sections of sea wall in various stages from painted through to still in packets.

Thanks for looking.