Translate

Friday 28 June 2013

6mm ACW Confederates finished

The glue on the flags is finally dry, so here are a couple of hasty photos of the confederates.  I don't have enough space to set them out as a proper battle line so here they are formed up in columns line abreast, flanked by mounted cavalry and screened by skirmishers.  The flags are from Baccus with each command stand mounting a national flag and a state flag - Texas on the right and Virginia on the left.


I think it's only when I see a whole bunch of figures en mass that I'm pleased with the result.  I like the feeling of mass, despite the small stature of the individual models.  I'm really looking forward to playing some scenarios with these - squaring off a couple of divisions on a 6x4ft table should look really good.

Here they are in a fairly cramped double line deployed over some Kallistra hills.
 Some of the boys from Virginia, deployed around an artillery battery.

I'm really pleased with these, so back to the painting table to rattle off the next batch.

Thanks for looking.

Wednesday 26 June 2013

Yet more 20mm modern skirmish

Modern Chechen fighters from Under Fire Miniatures.  These will be providing a better trained militia for Andreivia.  Not sure yet which faction they will be supporting.

Chechen 2 SAM/HQ team.  Observer/leader with binoculars, PKM MG, SAM7 and AK47 firing.
 From behind.
 The leader/observer and PKM machine gunner.
 SAM-7 and AK-47 gunners.
 Chechen 1 Tank Hunters.  Standing slung AK-47 (another possible leader), PKM MG, AK-47 and RPG-7 figures.
 And from the back.
 The PKM machine gunner with possible leader figure.
 RPG-7 and AK-47 figures.

Again, nice figures to paint, undercoated in white acrylic gesso, shaded with army painter dark tone ink applied as a wash and painted using Vallejo paints.  Matt acrylic varnish by Wilkinson's.  Next, the Taliban.

Thanks for looking.

Sunday 23 June 2013

ACW Black Powder - Gettysburg Blocher's Knoll scenario

A couple of weeks back Will and I played out a Gettysburg scenario using Black Powder.  As ever, when playing Will, the scale used was 20mm and the figures mainly plastics from his extensive and comprehensive collection.  He had selected a scenario from "Wargames Soldiers and Strategy" Issue 66 by Mike Evans and Don Effinger entitled "The destruction of 11th Corps".  This scenario involves quite substantial forces on both sides and recreates the fight for Blocher's Knoll, now known as Barlow's Knoll, a site I had the privilige of visiting back in May.  The federal player gets 5 brigades, four deployed on table and one in reserve arriving on turn 3 (the reserve brigade historically never made it but the scenario allows it to deploy as a "what if").  The confederates get 4 brigades, all on table at the start.  The scenery is dominated by a north-south wooded brook, Rock Creek, to the east with a knoll (Blocher's Knoll) offering a good artillery platform (except for a strip of dead ground around the knoll where artillery cannot depress sufficiently to cover) just to the right of centre.  One confederate brigade (Doll's from 3rd Division) and artillery battery are deployed in line to the north, while the other three brigades (from Early's 1st Division; Gordon's, Hay's and Avery's) plus artillery batteries come down in column along a road east of the brook, which crosses via a bridge and contines south past the knoll.  Rock Creek is a minor obstacle to infantry with stands required to halt at the banks, cross on the next successful order and advance beyond on the third order.  Artillery can only cross at marked bridges.  The federal troops deploy in line with, from west to east, Schimmelpfennig's, Krzyzanowski's, von Gilsa's and Ames' Brigades.  Schimmelpfennig's Brigade had deployed two regiments (45th New York and 61st Ohio) as skirmishers in front of the federal line west of Blocher's Knoll.  Federal artillery were concentrated in Blocher's Knoll.  Most federal leaders were rated 7 while the reb leaders were 8's with a couple of 9's.  Black Powder rules were used largely as written except that we changed the firing so that opponents fire after active player moves, to prevent an advance to close range and delivery of a devastating volley without receiving fire.

The confederates pushed Gordon's Brigade across Rock Creek under cover of an artillery battery, while Hay's Brigade moved down the eastern bank of the brook along with another artillery battery.  On the reb right flank, normal range artillery fire began to take a toll on the 45th New York skirmishers.  The federal response was to concentrate fire from von Gilsa's and Ames' Brigades and artillery on the east side of Blocher's Knoll onto the lead regiments of Gordon's Brigade.  The federals then moved Ames's Brigade forward.  In response, reb fire was limited in effect, although Gordon's front regiments assisted by artillery support began to hit home on von Gilsa's Brigade.

Next turn, Gordon's follow-up regiments advanced to the front while Gordon and Early attempted to rally the original flont line regiments.  Hay's Brigade continued down the left flank reaching a point opposite Ames' flank, as did the accompanying artillery.  Avery's Brigade followed up to the bridge.  Firing was particularly bloody between Gordon's and von Gilsa's brigades, while long distance artillery fire from the western side of Blochers Knoll and the west flank of the rebel lines again took a toll of Dole's Brigade and the 45th New York in particular.

In the next rebs turn, Hay's Brigade forded Rock Creek and formed a line facing the flank of Ames' and von Gilsa's Brigades.  Ames' Brigade swung to face the new threat, but close range volleys took their toll.  Gordon's Brigade was pretty much spent, but so too was von Gilsa's.  Avery took this opportunity to blunder and headed back up the road away from the action.  Over on the reb right flank Dole's Brigade and the supporting artillery broke the 45th New York.  At this point Costers Brigade began to appear behind Ames' Brigade, although attached artillery blundered, delaying them for two turns.  Unfortunately, next turn these came under effecitve fire from Hay's Brigade, albeit doing damage themselves in return.

In turn 5,  Hay's and Gordon's Brigades pretty much spent themselves, although at the expense of breaking Ames' and von Gilsa's Brigades and effectively neutralising most of the reinforcing Brigade of Coster.  Over on the rebel right flank, artillery exchanges did for one of Doll's regiments and one of Schimmelpfennig's leaving honours even.

By the start of turn 6, where we had run out of time, the rebels had broken Ames' and von Gilsa's Brigades, leaving just one effective regiment in each brigade.   Schimmelpfennig's Brigade over on the federal left flank had lost 2 of 5 regiments, while Krzyzanowski's Brigade was effectively unengaged throughout so remained at full strength.  Although not broken, both Gordon's and Hay's Brigades were no longer effective, but Avery's Brigade had made their way back to the bridge and were in the position to flood across and assault the federal artillery on Blochers Knoll with support from a number of rebel artillery pieces.  We therefore agreed that the confederates would have been able to force the three union right flank brigades to flee the field, probably then allowing them to mop up the two remaining federal brigades from the flank while pinned to their front by Dole's Brigade.  Although the rebels hadn't lost 50% of their infantry at the time we had to finish, we suspected they would reach that level, so, according to the scenario victory conditions it would be classed as a draw.

The difference between the rematch and a historical outcome seems to have been the arrival of Coster's Brigade to bolster up the federal lines.  In reality, Coster was ordered forward in support far too late in the day to do more than to fall back with the routing 11th Corps into the outskirts of Gettysburg.  In the rematch, at the point where they appeared Gordon's and Hay's Brigades had pretty much defeated Ames and von Gilsa.  Without Coster, the rebs would have been free to sweep around Blochers Knoll and attack along the flanks of the federal line, pretty much the historical outcome.  Instead, they traded fire with Hays, degrading them at their own expense, but effectively neutralising the threat on the left flank until Avery's Brigade was able to come up.  All in all a really fun scenario, played in a great spirit, Will kept smiling despite my glee at watching yet another federal regiment failing it's morale and fleeing the field.  If this is an indicator of the fun in playing the other scenarios in the issue, we'll be in for a good time.  There is even an option to amalgamate all the scenarios into a large scale refight of the whole of the first day at Gettysburg on a giant L-shaped layout.  Something to think about with at least three players per side and a club games weekend to give enough time.

Aplogies but no camera, so no piccies.  I will definitely have to remember it for the next scenario as over 20 regiments per side, each made up of four stands of four 20mm figures, makes an eye catching spectacle.

Some photos of the real terrain from previous posts.

Barlow's statue on Blocher's/Barlow's Knoll.  The trees behind line Rock Creek.
 Federal artillery positions on top of Blocher's Knoll with Rock Creek in the trees behind.
 Looking more or less due north from Blocher's Knoll into the dead ground where artillery couldn't depress the guns sufficiently.

Thanks for looking.

6mm ACW confederates

After Arctic Strike in April, I decided I needed a rest from modern cammo colours.  I've been playing a lot of Black Powder games including Jacobites, Napoleonics and a lot of ACW.  When Rick approached me and asked if I was interested in collecting a side each in 6mm to play BP ACW, I was quite keen.  I wasn't too worried about which side I wanted to take up and Rick was keen to play the Union, so I agreed to create a Reb force while he built up a Federal force.  While the pro-slavery stance of the confederacy is not an attractive feature, it wasn't an issue in the early years of the war and didn't prevent Great Britain (with a long history of anti-slavery) from taking a pro-confederacy stance, so I'm not too phased playing the confederacy

We both sent off orders to Baccus in the first instance (I plan to add some Adler figures in the not too distant future).  My order included mounted and dismounted cavalry, packs of formed infantry (regular and zouaves) and skirmishers, artillery, command and casualties.  We agreed a basing convention with regular infantry mounted in two ranks on 40x20mm bases, with three bases per regiment.  Skirmishers (4 figs/base) and dismounted cavalry (4 figs or 2 figs plus horses and holder per base) are on 30x30mm bases with 4 bases per unit, while artillery pieces (one piece per base) are mounted on 40x30mm with one or two stands per battery.  Mounted cavalry are on 40x20mm bases (4 horses and riders/base) with 3 stands per unit.


An infantry regt in line.  I've tried to give them more of a rag-tag feel with various hat colours (mainly grey but with various browns and very dark grey), some variation in blanket rolls and the occasional red shirt.  I must say, the variation Baccus put into the individual figures is superb - you can differentiate the stature of youths and men, clean shaven, moustached and bearded, some have blanket rolls and some don't.  Altogether the variation in the line is excellent for 6mm figures.
 A regt in line but with a skirmish line thrown out to the front.
 An artillery battery comprising two smooth bore artillery pieces plus crews.
 A mounted cavalry regt in line.
 Mounted cavalry in column.
Dismounted cavalry forming a skirmish firing line, note the horse holder stands to left and right.

 A cavalry commander stand.
 As above, slightly more close-up.

So far, I've completed 5 infantry regts, 3 units of skirmishers, 2 artillery batteries and 4 cavalry regts (2 mounted, 2 dismounted).  I've also painted, but not yet based, a pack of commanders.  Still got several infantry regts and artillery batteries (I was tempted by a couple of expansion packs at Phalanx), zouaves and cavalry to paint up.  Also got a couple of flag sheets so will try and get them mounted and then take a picture of the entire force so far, as I'm keen to see what sort of visual experience they provide en mass.

Thanks for looking.

Saturday 22 June 2013

More 20mm modern skirmish

Not a good day weatherwise so pressed on with the UFM militia for Andreivia.  These four figures are from Militia pack 2.  From left to right firing AK-47, patrolling with PKM MG, standing with AK-47 in Balaclava, and walking with RPK MG.  I've painted these in a mix of khaki cargo pants, jeans, T shirts and a ninja-esque balaclava figure.

The balaclava wearing AK-47 and RPK gunner.
 The PKM gunner, who also carries a small radio on his belt, plus AK-47 gunner.

Next up, the UFM Chechens, if all goes to plan.  Thanks for looking.

Friday 21 June 2013

Modern Skirmish 20mm

Having invested in Force on Force and Arc of Fire recently, I decided it was time to put together some forces for modern skirmish games.  As I'm planning on playing at the Crisis Point game next April, set in the fictional Black Sea country of Andreivia I decided to put together a militia force for the game with some opposition provided by some Major Power intervention forces.  The latter were easy, a box each of Italeri Modern US infantry and Soviet Special Forces, both from ModelZone sales in Liverpool and Plymouth.  I also added a couple of boxes of Esci Modern British and German infantry, courtesy of Will from the Defenders club.  For the militia forces I scoured various web sites and finished up purchasing a set of each of the Militia, Chechen and Taliban offerings from Under Fire Miniatures at Phalanx last week.  Using them all together should give a nice, ethnically diverse militia force.  I added a ready painted BMP-1 from Grubby Tanks and plan to equip a couple of pick-up trucks as "technicals" at some point in the future.  So, this week I found myself painting 20mm miniatures for the first time in 30 odd years.

First up, UFMs Militia pack 1, one kneeling and one standing figure firing AK47s, one advancing at the ready with AK47 and slung RPG-7 and a running figure with AK47 and disposable AT weapon.  I painted these in a mix of combat fatigues, denim jeans and T-shirts.
 AK-47 firing and running figure with AK and disposable AT launcher
 Kneeling firing AK-47 and advancing with AK-47 and slung RPG-7.
 US infantry/Marine section/fire team.
 Section commander and two advancing infantrymen.
 Kneeling and standing firing figures plus a running/charging figure.
 British 90's infantryman test from the front -
 - and rear.
 Soviet naval paratrooper test, from the front -
  - and rear.

Looking forward to getting these forces and their unpainted lead/plastic comrades on the table.  I've heard nothing but good things about FoF and AoF so looking forward to trying each of these out in the near future.  First read through suggests both should be good fun.

Thanks for looking!

Tuesday 11 June 2013

The USMC assault Bodo - for a second time

At the end of May we managed to replay the USMC assault on Bodo, an attempt to try out the same scenario from the Arctic Strike megagame back in April.  Richard and Gordon generously let me have their force compositions, an airborne batallion and a sea transported infantry batallion with T55 battalion in reserve off table, together with a map of their set up.  Ian and I were able to put together enough of the right Warpact equipment to pass muster as the opposition.

We set up the table using three 6x3ft folding tables with a blue cloth for the sea and carpet tiles for the terrain.  The photo shows the table as we laid it out, with Bodo to the right and the fjord coast at the top of the view.  The relief land forces would be coming from the east along the coast road (top left).  The coast itself is modelled as heavily wooded, offering soft cover.  All Warpact forces were dug in at the start of the game.

The crucial differences between this game and Arctic Strike was a) chemical weapons weren't available and b) pre-planned naval artillery was available to the USMC.  The AAR below is based on my memory of the key events - I didn't take any notes at the time, but seem to me to show the key features of the game - apologies if I've missed anything out.

The table layout looking south.
 
 And again.
 The layout looking west.
 The landing beaches looking north - landings took place between the wind turbine (the closest we could come to a lighthouse) and a WW2 fortification to the left of the view.
 Seacobras attacking advancing T55s.
 The USMC beachhead with M60s probing inland to meet oncoming T55s.
 And again.

This time I chose to land two infantry battalions and a reinforced M60 tank company across the beaches, keeping the third battalion in reserve to call in across the beach or by helo wherever the opportunity presented itself.  In the first turn, the Americans laid down a pre-planned smoke barrage delivered by two batteries of naval artillery and the infantry and tanks stormed ashore with negligible losses.  The Bronco transported FAC met with the same fate as at Arctic Strike, being brought down by manpack SAM fire (I'm going to have to keep their feet on the ground in future.  The Soviet response was to move artillery and air controllers to get a better view of the landings and to get the off board batallion of T55s heading south towards the threat from the coast.

In the second move, the USMC forces began to spread out laterally, assaulting or direct firing at dug in infantry around the WW2 fortification and wind turbine, while the armour continued to advance inland.  The Soviet response was largely to call in the salvo rocket artillery assets (all 10 batteries of them) and keep the T55s moving south.

By the third turn, the T55s were in sight and Seacobras were called in to attack, to assist the M60s in their line-of-sight slugging match with the T55s.  The TOWs of the Seacobras accounted for a T55 stand, but SAM fire revealed a number of Soviet units.  The M60s also began to take a toll of the T55s.  Dutch heavy artillery counterbattery fire began to whittle down the rocket artillery.  In the Soviet turn, two M60s were suppressed, but saving on a three was enough to ensure no losses.  Further rocket artillery strikes again whittled down some infantry, but not enough to be a problem.

In turn 4, Seacobras and M60s again whittled down the T55s, leaving only 3 stands by the end of the turn.  Naval gunfire support also began to inconvenience the Soviet SAMs and the adjacent dug in infantry and HQs.  The Soviets began to pull back some of the outlying forces, especially SP mortars, which blundered on the way back across the airstrip.

The last two turns of the evening saw the left flank USMC infantry batallion, less a company still engaged in mopping up Soviets in the WW2 fortification, advancing towards the hardened aircraft shelters.  On the right flank, infantry supported by LVTP-7s were attempting to mop up dug in engineers armed with flamethrowers on the right flank - tricky.  In the centre, the M60s dealt with the T55s.  The Soviet response started to cause losses to the infantry battalions.

So, in 6 turns the USMC had established a reasonably firm beachhead and still had an infantry battalion in reserve.  The Soviets had lost most of their T55s and a significant proportion of their artillery and SAM assets.  So, what were the main differences between the Arctic Strike version and the replay.  Well, the chemical attack on turn 1 at Arctic Strike eliminated a significant proportion of the infantry in the beaten zone and suppressed and degraded all of the M60s.  When subsequently hit by rockets (lots of them) the armour was knocked out (4 platoons worth) and infantry battalions were seriously degraded.  This time, the cover of smoke prevented rocket attacks in turn 1 - by turn 2 the infantry and armour had been able to spread out significantly.  Rick, the Soviet player, had responded as aggressively as he could with the forces available, much as Richard and Gordon did at Arctic Strike, but without the initial chemical attack and concentration of rockets,  the Soviet fire was not capable of seriously whittling down the attackers, particularly the M60s which are surprisingly tough.

All in all a fun game.  Thanks to Rick for proving an aggressive opponent and to Ian and Mick for umpiring and generally seeing to fair play, as well as providing all manner of period flavour.

Saturday 8 June 2013

Pittsburgh panorama

Not really wargames related, but I was most impressed by the view of Pittsburgh from Washington Heights.  I think this must by a good candidate for one of the most impressive views of any city I've ever seen, alongside Cape Town with Table Mountain and Plymouth (the one in England) from Mt Edgecombe Park.


See for yourself!


Downtown in the angle at the confluence of the Allegheny (to the left of downtown) and Monongahela (extreme right)  Rivers, where they converge to form the Ohio River (on the left).  This is the gateway to the west, with the Ohio flowing out across the mid-Western prairies and into the Mississippi.  The city was once one of the most heavily industrial on earth, as the following images from the early 20th century indicate.  These are rather poor flash photographs of pictures on display at the top of the Duquesne incline, a funicular railway that ascends from the South Shore to Washington Heights.


Gettysburg Battlefield 2013 - 150th Anniversary part 6 the Angle, Copse of Trees and the Highwater Mark of the Confederacy

Time was getting short and it was almost beer O'clock by the time we finished at the Peach Orchard, so we drove along Plum Run but didn't stop there, before heading on to the Pennsylvania Monument where we decided to miss out Spanglers Spring and Culps Hill before heading on to the Angle.

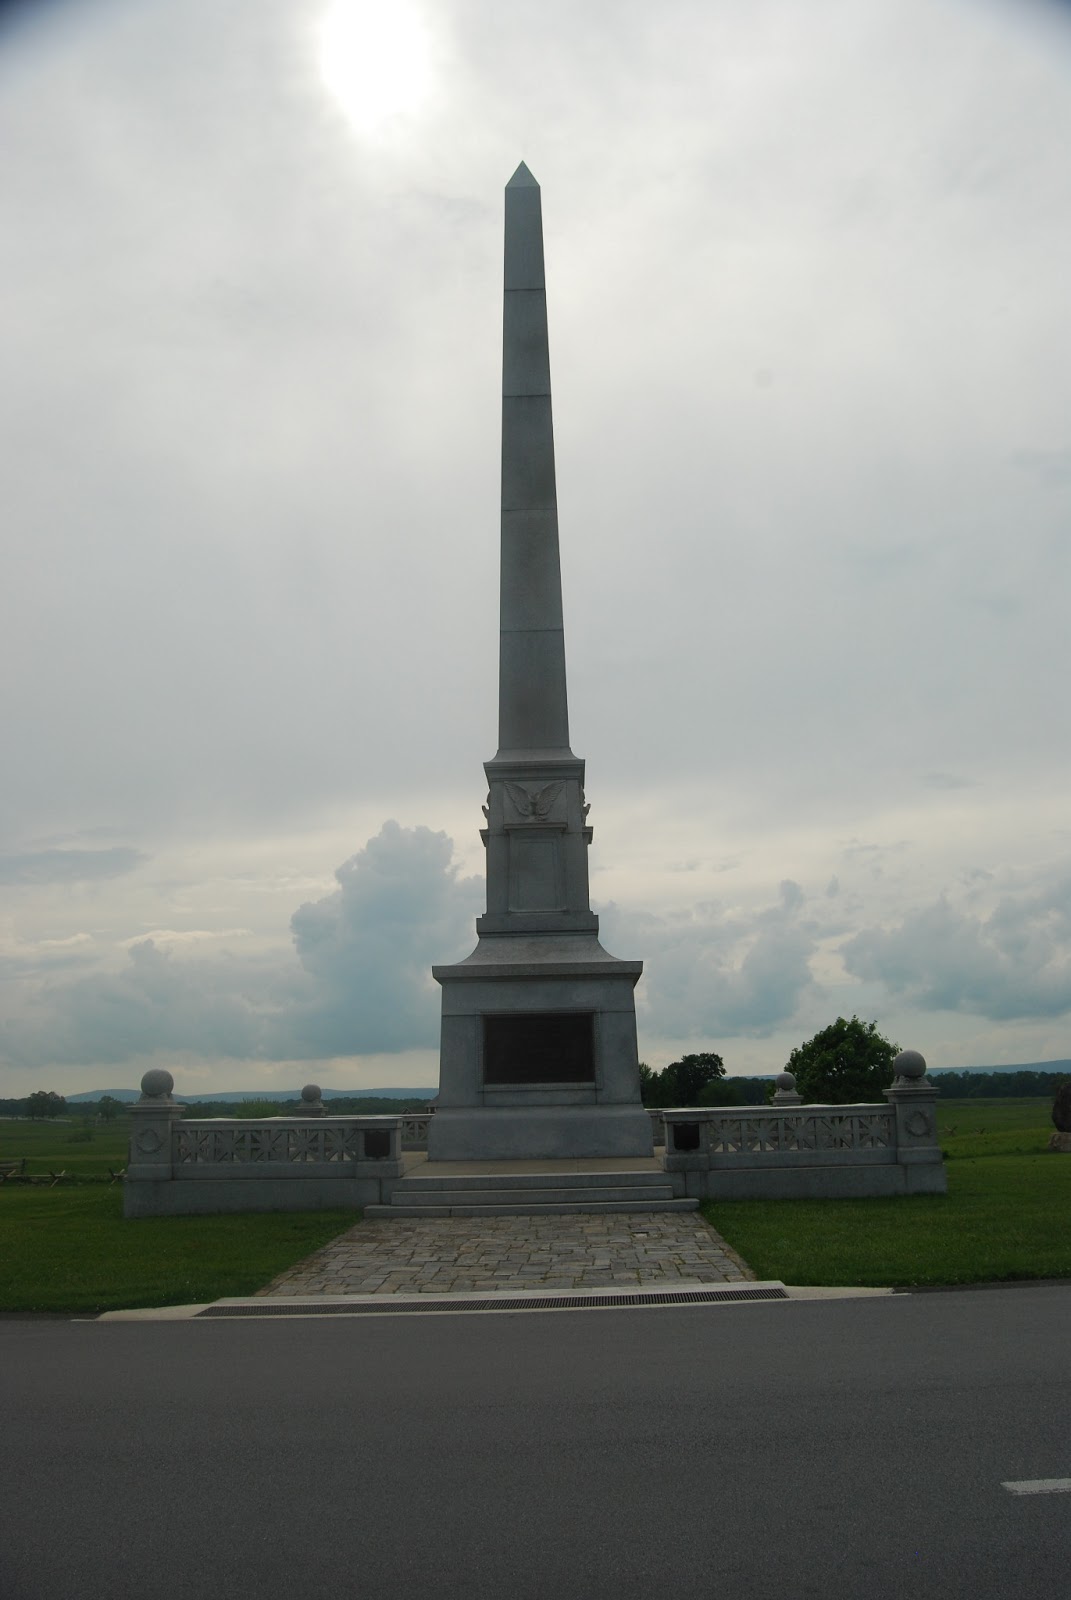
 This is the Pennsylvania Memorial, a very imposing structure.
 And again.
  Statues of Meade and Lincoln.
 Lady in period dress (on the left - don't think dayglo had been invented in 1863).
 The Pennsylvania Memorial, if I remember correctly it records the names of all Pennsylvania citizens who fought in the battle.
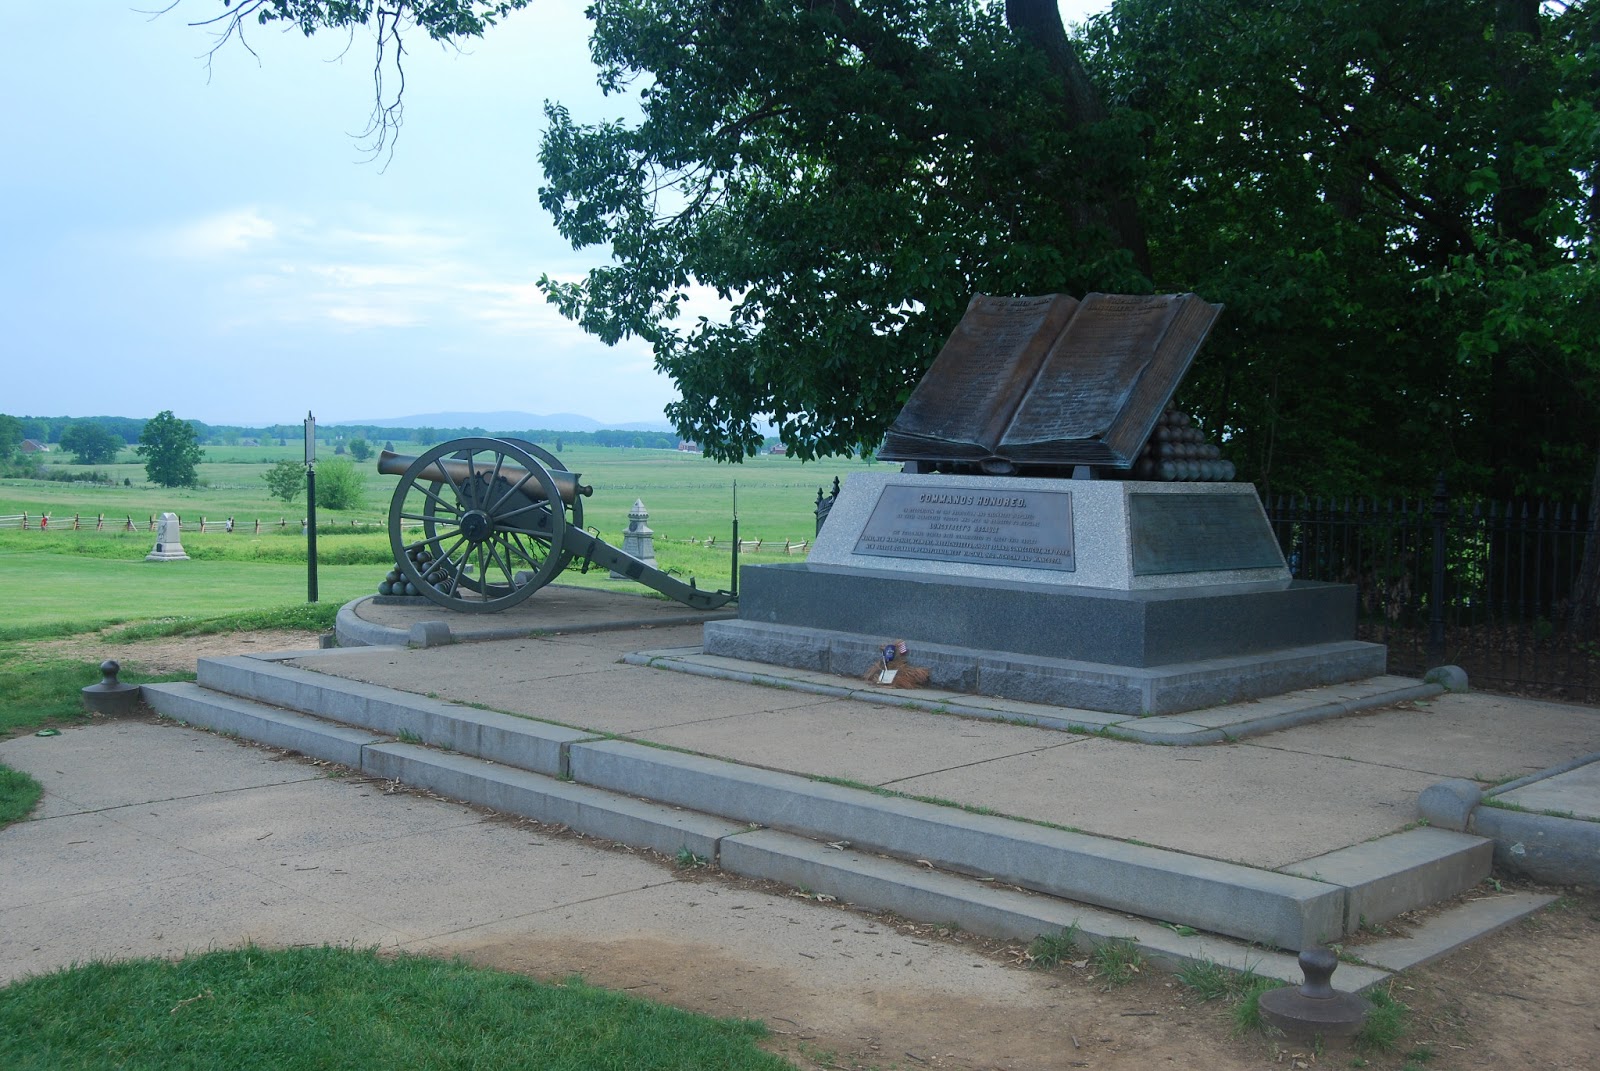
 A Minnesota Regt memorial on the union lines in front of the Pennsylvania Memorial.
 Monuments marking the union line on Cemetary Ridge.
 Can't remember what this one commemorates but it's on the union lines.
 Looking south along the union lines on Cemetary Ridge, the Pennsylvania Memorial in the distance.
 Looking north along the union lines, the Copse of Trees is on the right.
 A panoramic view looking west from Cemetary Ridge, the trees in the distance are those on Seminary Ridge that covered the initial forming up of the confederate assault forces for Picket's charge.  Note the undulations in the ground that at least provided some respite from grazing fire, but not much.  The Codori Farm is visible in the middle of the picture and the Appalachian Mountains can be seen in the far distance.

 The Army of the Potomac Memorial. 
 The Copse of Trees, looking north.  The union lines were facing to the left, on the left hand edge of this photograph.  The confederate troops that made it to the union lines crossed the low stone wall, only to find that three union regiments had wheeled back to fire enfilade into their flanks.  The union regimental positions are marked by the three posts with rectangular plaques in front of the trees.
 The Copse of Trees looking south.  Survivors of the charge that made it across the wall were faced with three union regiments in line, volley firing towards the camera.
 The Highwater Mark of the confederacy.
 And again.
 And once more.
 Union battery positions and the union artillery park.
 The memorial marking the approximate position of Armistead's mortal wounding.  His fall took the heart out of the remaining confederate troops who fell back, effectively ending the battle.
 Looking west, the Angle is an almost right hand turn to the left in front of the memorial by the tree.
 71st Pennsylvanian infantry memorial at the Angle.
 Looking south from the Angle.
 Memorial to a Zouave Regt, close to the Copse of Trees.
 The Highwater Mark again.
 The line of union memorials behind the Copse of Trees.
 An unusual motif for a New York unit, with a North American indian and a wigwam.  This is the memorial to the 42nd New York infantry.

We finished up with a visit to the Soldiers Cemetry.  This is the memorial close to the site of Lincoln's Gettysburg Address, delivered at the inauguration of the Soldiers Cemetary.
 The Soldier's National Monument.
 Not much of a headstone, but better than the "unknown" next to him.  Considering many of the dead were left on the ground or in shallow graves for the best part of a year after, it's better than nothing, but contrasts with the grand monuments elsewhere onthe battlefield.

Quite a lot of them though.

So, that's where we ended our tour.  The Appalachian Brewery bar and restaurant on the outskirts of Gettysburg was calling.  On  the whole well worth seeing if the chance ever presents itself.  150 years ago this July 1st, 2nd and 3rd.

Thanks for looking.