Translate

Thursday, 8 March 2018

Battlegroup Kursk game

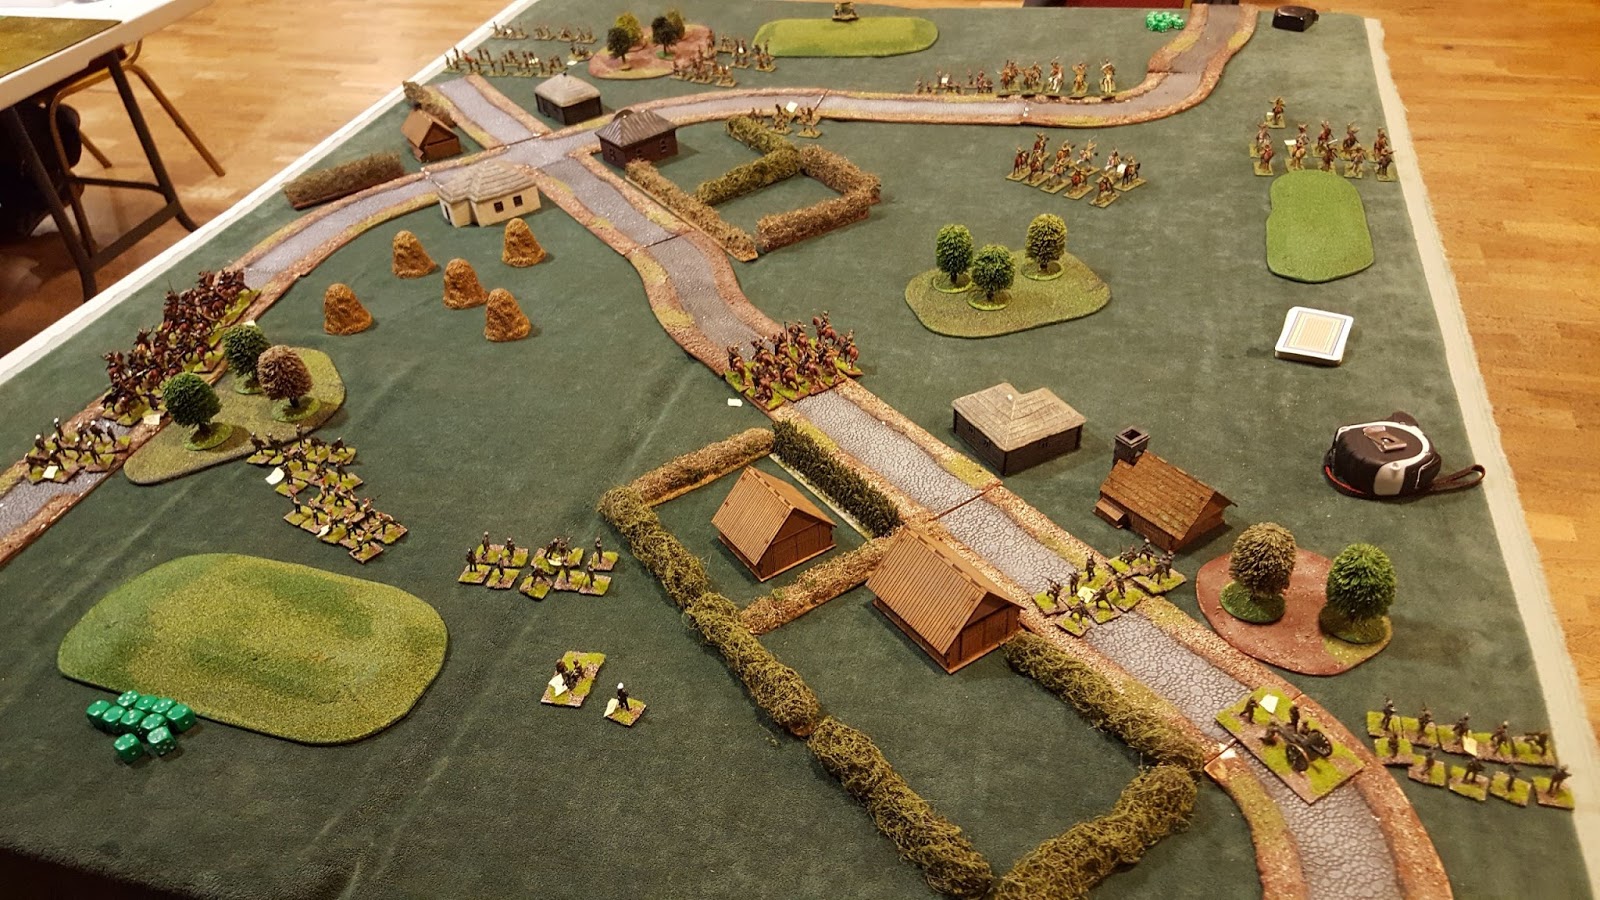
This is a Battlegroup Kursk game with Soviet infantry and T-34s taking on a mixed bag of panzergrenadiers, Stugs and Panzer IVs.  The Russians are from Will's collection and the Germans are Steve Hann's.


Quite a simple table with some low hills, woods and a small town/village at the German end of the table.  If I remember correctly (this was played in January) the Germans had 500 points including defences, while the Soviets had 600 or maybe 700 points.


The German infantry dug in on the edge of the village, while the armour lurked menacingly behind the cover of the buildings in the village.  The Soviet infantry fanned out and advanced on a broad front, while their tanks decided to advance on the German left flank, shielding themselves from German fire with a low hill and woods.  Being wise to this, the Germans bided their time and waited putting their vehicles on ambush fire or reserve move.


Once the Russian tanks got within range of the Stugs and Pz IVs, there was a flurry of long range gunnery, with the Germans obscured and the Soviets largely in the open.  This was only going one way.  The Stugs, with their limited ammo loadout, needed frequent resupply - fortunately there was a truck standing by.  He led a charmed life, avoiding any serious pinning issues from the Russian mortars.


In revenge, the Soviets shot up the front line defenders, raining down mortars, which whittled away the defenders.and KO'd the observers Kubelwagen.


The Soviets had lost almost all their mobile armour by the end of the game, although their infantry was largely untested.  The Germans had lost significant amounts of infantry and had some bad luck in chit scores.  When we called the game, the Germans were close to their BP, while the Soviets were only c. half way to their BP, so we agreed a Soviet victory, although the Germans grumbled about the devastation inflicted on the Soviet armour.


Another fun game.  Thanks for looking.


Sunday, 4 March 2018

Unofficial Battlegroup modern 6mm game

Last Thursday's game saw Ian and I play out a game of Richard C's unofficial Battlegroup Modern rules.  We decided to go for a 6mm scale and play a larger, attack-defence game.  The British took 840 points and the Soviets took 1100 or thereabouts.  I was surprised by Ian's choice of Battlegroup as he opted for a T-72 company supported by a platoon of infantry in BMPs and a Shilka.  My British comprised a mechanised platoon, dug in in trenches, supported by a Chieftain Mk11 troop, 2 dug in Milan firing posts,a Swingfire ATGM, Blowpipe team in Landrover, artillery spotter team in Landrover and, crucially as it turned out, 2 tubes of 81mm mortar support and two tubes of 155mm artillery support with one salvo of FASCAM.

This was the battlefield, laid out with a small village in the distance on the NATO right, and another in the foreground on NATOs left, within their defensive perimeter.  I deployed the Chieftains foreward, behind the small hill right of centre.  The infantry and a Milan teams were dug in on the edge of the village on the left and woods on the right of the pond.  A small reserve was also dug in around the farm complex on the right and woods in the immediate central foreground, with a Milan team dug in on the hill.

Neither of us brought recce, so neither was outscouted.  Soviets had the first move as they were attacking.  The Brits rolled 5 for their units on ambush, so 3 units, the 2 Milan teams and the FV438 Swingfire went on ambush.


Ian used his battle drill to advance his T-72 company, less one platoon, cross-country down the British left flank at top speed.  The last T-72 platoon advanced slightly right of the main company, while the BMP platoon lurked behind the hill in the far distance on the centre of the table.  The dismounted spotter for the FV438 spotted one of the T-72 platoon tanks in the centre and brewed it up.

In the British turn, the artillery observer called in a FASCAM strike on the area between the two woods on the British left and the small hill, rolling normal accuracy and a deviation of 7 inches, landing right on top of the bunched up T-72s and the FHQ, also in a T-72.  Mortars hit the hill top in front of the BMP platoon, causing some pins.  The Chieftain troop took up hull down positions on the hill on the right and shot up the lone T-72 platoon, pinning another tank.


The centre of the FASCAM area marked by the spotter chit in the foreground.  This was effectively game over for Ian's Soviets.


With the rest of the British orders in Turn 1, several infantry units on the British left went on ambush fire.


And on the right.


Ian then discovered that with d6+2 attacks from the FASCAM on top armour, any attempt to move resulted in a brew up.  Ian decided that the surviving tanks were effectively neutralised until some mine clearance vehicles could be call forward.


Ian gamely pushed his T-72 from the detached platoon, forward, only to make a great target for a Milan team, which promptly despatched it.


His BMPs did manage to immobilise the troop commanders Chieftain with a salvo of SA-4 ATGMs (top left in photo below).


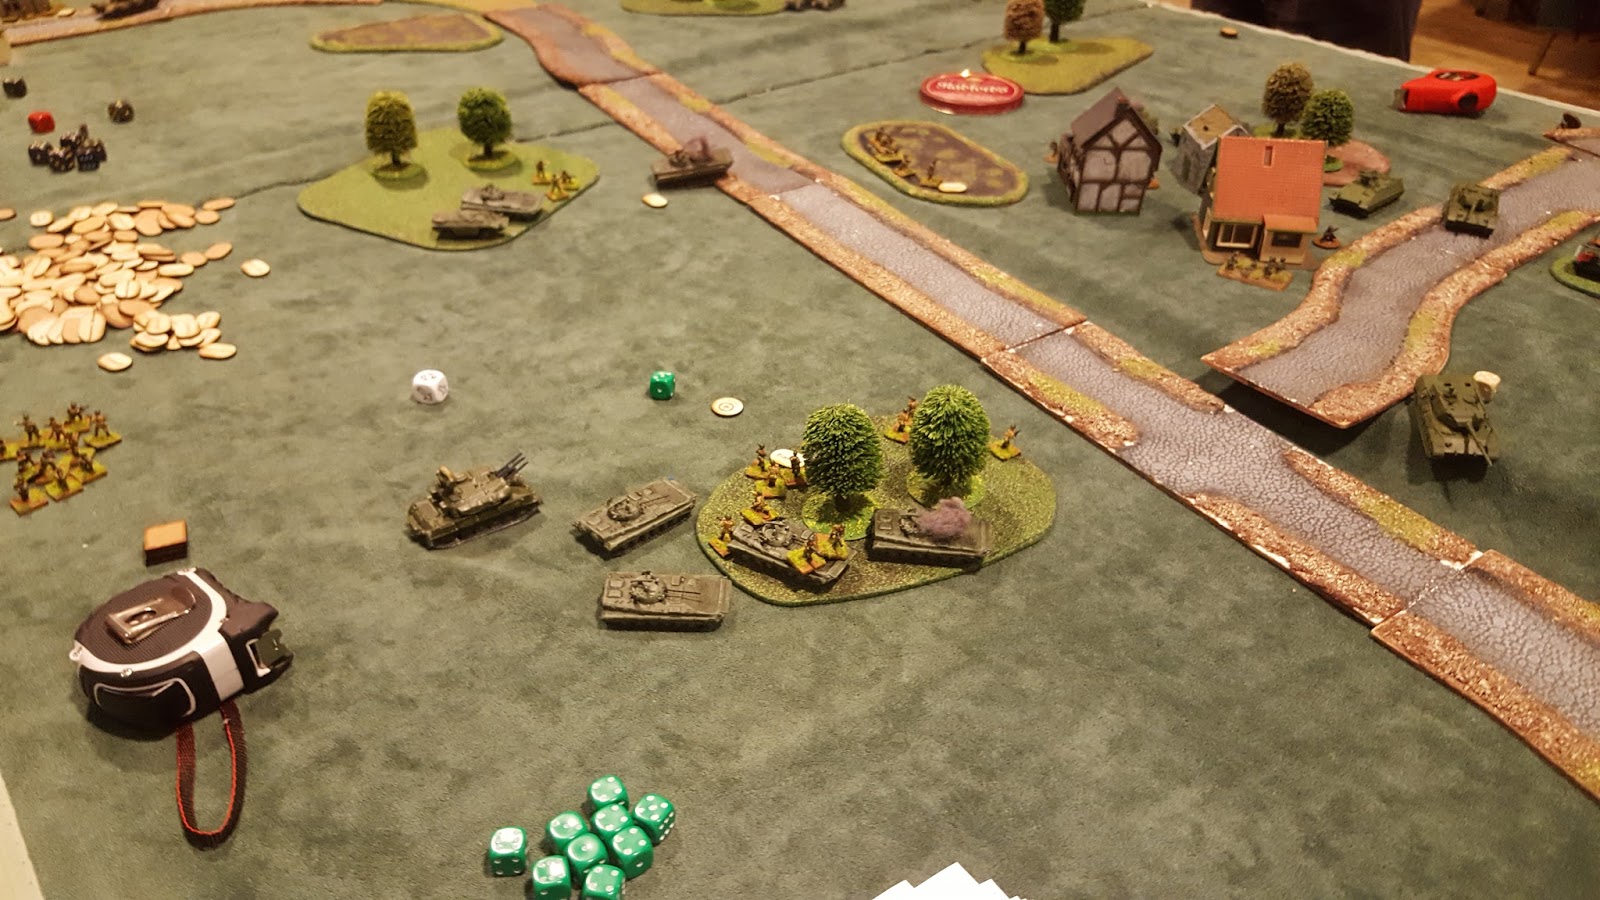
The situation near the end, with the BMPs in the far distance battered by 81mm mortar and 155mm artillery fire.


Ian did draw a helicopter chit and brought on a Hind E, catching my Blowpipe team unaware and not on ambush fire.  The Hind took out another Chieftain with ATGM fire, but was then hit by a Milan ATGM on ambush fire.  We were unsure how to resolve the attack, but it appeared the Milan team blew it out of the sky.

At this stage, snow was still coming down steadily, so we called an end to the game, even though the Soviets still had spare BPs, while the British had taken 3 points of damage.

Reflections on the game:
Ian's tactics of bunching up his T-72s and concentrating firepower turned out to be the wrong thing to do in the face of FASCAM.  With some lucky drift, the Brits plopped it down right on top of the whole company stopping it in its' tracks, literally dead if they tried to move.

We wondered if FASCAM was a little too powerful with d6+2 vs top armour.  We thought maybe d6+2 for the first turn after deployment and/or first turn entering the minefield, maybe falling to d3+2 or even d3 for further turns.  I'm not convinced, but it was a game changer for Ian.

Thanks for looking.

Friday, 2 March 2018

Setting the East Ablaze

A couple of weeks back, Will and I tried out Setting the East Ablaze.  I picked up a copy at Vapnartak at the start of the month, so we gave it a go.  I'd only managed a brief read through before playing, so we were fumbling around a lot trying to work out some of the mechanics.  However, it was a fun game and I really like the period - not just the historical options, such as Reds vs Whites, Reds vs Ukrainians, Reds vs Central Asian kingdoms, Russo-Polish, Russo-Finnish, Czech Legion, Greece-Turkey, etc, but the what ifs, such as Allied intervention in the RCW, Turkey, Red invasion of India, Red invasion of Germany - all interesting settings.

Because we were learning the rule set, I don't really have a coherent after action report, but the table looked great.  We played a meeting engagement between Will's plucky Reds and my stalwart Whites, the photo below showing the situation at the end of turn 1 from the White end of the table.


The Whites were as keen as mustard on the left flank, but more reluctant on the right, but not so my newly painted unit of Strelets WW1 Russian Hussars, who merrily cantered along the road, despite the proximity of all those Red Cavalry in the Budinovkas.


The Red Cavalry were getting too close to the White Hussars for comfort.


But being death or glory boys, they took the Reds head on in a charge.


A rather self-immolating charge.


The Whites on the left reached the village at the same time as the Red infantry.


A furious exchange of ineffective shooting, slowly whittling away both Red and White, but then the Reds had more infantry to hand.


The costly melee goes on, with the Hussars taking serious losses, albeit inflicting damaging losses on the Reds, but then they have two more units nearby.


A fun game.  I think I was out manoeuvred in the early stages and never really caught up.  Still lots to discover about the rules,. but quite a nice effect caused by the randomness of card activations.

Cheers, Andy

Sunday, 25 February 2018

Unofficial battlegroup modern second try

Pete and I tried out Richard C's unofficial battlegroup modern rules again on Thursday.  Another 500 point meeting engagement saw my British armoured battlegroup take on a battle group of Pete's Soviets.  My force consisted of a troop of Chieftain Mk9s, a mechanised platoon of infantry, an FHQ and a mortar spotter, each in Landrovers, an FV438 Swingfire and 2 tubes of off-board 81mm mortars.  Pete's force appeared to consist of a 4 tank troop of T-72s and a platoon of infantry in BMP-2s.

I was out scouted so took a chit (a 5) and Pete won the initiative dice roll.  He moved up so his ATGM-armed BMPs took up concealed positions at the edge of woodland and behind low hills at his end of the board, while his T-72s moved en mass towards my right flank.  In response, I pushed my Chieftain troop down my left flank staying out of sight behind some low hills.  My mortar spotter, a section of infantry and the FV438 took up positions in the wood next to the Chieftsain troop, while the rest of the platoon and FHQ headed for the woods on my left.

In the second turn, Pete dismounted most of his infantry squads and they pushed forward over open ground.  He placed most of his vehicles on ambush fire.  My infantry shook out taking up firing positions along the edge of the woods, the FV438 also moved to a direct fire position on the edge of the woods and the FHQ and mortar spotter took up observation positions.

End of turn 2, table view from the British table edge.  Note the Chieftains skulking behind the hills and the woodlands filled with assorted infantry.   In the distance, Pete's infantry are rushing forward, while his vehicles overwatch.


Turn 3 and I suffered a rush of blood and moved the Chieftains up to take firing positions hull down on the hills.  A flurry of ATGM fire from Pete's overwatch BMP-2s had little effect, but T-72 fire did for one of the Chieftains.  In response. the surviving Chieftains engaged 2 BMPs and a T-72, achieving a total of no hits.  Turn 4 saw Pete despatch the remaining Chieftains with T-72 fire and an ATGM.  Having despatched by Chieftains, he thought the game was over and pushed his dismounted infantry forwards, supported by BMPs, while his T-72s unsuccessfully took long range shots at my infantry on the right.  Worried about the infantry approaching on the left, I sent an FV432 out behind the destroyed Chieftains in the hope of putting it on ambush fire ready for when the Russian infantry come over the hill in front.  Turns 3 and 4 saw my mortars raining some harassing fire on Pete's infantry and T-72s, causing some pins.

End of turn 4.  BMPs and infantry pushing forwards on the British left and centre.  T-72s shoot at the British right.


Turn 5 saw Pete get unlucky with command dice with little movement, just some ineffective long range tank gun fire on my infantry.  My troops decided to keep their powder dry, except for mortar fire, which did for one of the BMPs on the left.  Lots of sections on ambush fire.  However, my rifle squad took a long range Charlie G shot from the edge of the woods on the right at the BMP in the centre and brewed it up.


Burning Chieftains.  The FV438 realised it had the dismounted observer option, so dropped them off at the edge of the woods and retired to take up a new position behind the woods.


The brewed up BMP - lucky for Pete his squad had just dismounted.


Turn 6 saw in interesting but totally ineffective small arms duel between Pete's troops on the left and my infantry in the woods, involving his two infantry squads on the hill moving up and exchanging shots with Brits in the woods including ambush fire from a GPMG and rifle section, as well as ambush fire from BMPs.  All either failed to spot or missed.  On the right and centre, Pete's T-72s closed the range, while his infantry pushed forwards.  Fire from these infantry cut the rifle section down to one Charlie G armed figure, but he passed his morale test so didn't break.  In the British turn, fire from an FV432 and the various infantry in the woods swept through the exposed Russians on the hill, clearing it of all but the dead and wounded.  The sole surviving Charlie G trooper pulled back into the woods, where the platoon command section waited in support.


British infantry in firing positions from the edge of the wood.


The effect of long range T-72 gunnery on the British right.


In the final turns, Pete's infantry and T-72s either couldn't spot or hit any of the Brits deployed in the woods on the right and even when a hit was achieved, the British managed to save on a 5+.  The British finally got the FV438 in firing position and promptly despatched the central T-72.  Unfortunately, mortar fire was wildly inaccurate on the Russian infantry and drifted towards the British so was called off and radio comms went dark in the last turn.  However, Pete announced that he was 1 BP from breaking, whereas I hadn't reached 50%, so it being almost 11pm, we decided to call a halt, the Russians pulling back and the British moving to take up new firing positions.

Once again, the rules were fast moving and fun to play, emphasising tactics, rather than fumbling through lists.  The new QRS sheets from Richard C really speeded up play even more, as did our knowledge of the stats and taking the time to locate the values for the specific vehicles we were using.

The only real question we had was whether vehicle ATGMs needed a reload order when they had fired their ready missiles.  We figured they had to take a turn out to reload, but did they need a reload order,

Observations on the game.

As the British player, I thought my goose was cooked when I lost the Chieftain troop.  These rules, however, give infantry their proper role of holding ground and denying it to the enemy.  It was heartening to see Pete's reluctance to approach infantry with Charlie Gs within 30 inches.

It did come as a surprise how difficult it was for the British to hit anything at long range.  What was even more surprising was that hits were generally ineffective, whereas T-72s firing back seemed to brew up Chieftains with each hit.

The British mortars were effective as harassing fire on infantry and armour, but killing hits could also be surprisingly effective against the thin armour on BMPs.  Pete really missed any off board artillery, which would have been a real plus in digging my infantry out of the woods.

In conclusion, a fun game, real period flavour and lots of interest from a lot of players I wouldn't normally associate with modern gaming.  So much so that devoted 20mm gamers are buying 15mm armies to be able to play these out with us.

As ever, thanks for looking.

Thursday, 15 February 2018

New additions

Just a quick post today to show some new additions to the stash.


First up is the haul from Vapnartak 2018.  I wanted the core of a 15mm scale British battlegroup for the Unofficial Battlegroup Moderns rules, so here are some Battlefront FV432s and Chieftains, plus an infantry platoon.  Then there is a box of LAVs to go with my USMC kit.  Rear right are my only purchases off the trader tables, a diecast PzII and a box of Caeser German WW2 infantry in greatcoats.


The FV432s are already assembled and base coated, a platoon of 4 infantry APCs and an FV438 Swingfire carrier.  The infantry are painted and awaiting basing.  The LAVs and WW2 kit have joined my stash.


Looking to fill out some 1980s British kit, I took a look at Butlers Printed Models.  Based on recent reviews and the price, I decided to have a go and ordered a Lynx ATGM helo, 2 Landys, 2 FV432 mortar carriers and a tracked Rapier, all in 15mm.  The image below shows the Landys, the one on the right as supplied and the one on the left after clean up.  These are nice models.  There are some contours visible on the sloped surfaces, but progressive paint layers has suppressed them quite nicely.  The plastic they are made from is a tough nylon-like material, which appears to be quite robust, although it doesn't file neatly, tending to fray rather than smooth out.  All that being said, they are a good price and detailed enough to help build an army cheaply.  They also offered excellent service.  I ordered them on Sunday and they were in my hands on Tuesday evening.  Excellent!


I've also ordered some of the Armies Army British kit now available from The Plastic Soldier Co at the same time, but not had anything turn up yet, so I will post pictures of these in due course.


Thanks for looking.

Friday, 9 February 2018

Unofficial Battlegroup Rules tryout

Last night, we tried out the unofficial Battlegroup Modern rules, published by Richard C of his blog http://coldwarhot.blogspot.co.uk/


Richard very kindly made these freely available on his blog, just before the Guild forum went into meltdown.  He has tried to keep the rules true to the original Battlegroup ruleset, with modifications to cover ATGM, SAM, Electronic Warfare, Chemical weapons, Helicopters.


After a read through, the rules were pretty straightforward to apply.  Because we were new to the modifications, there was some shuffling through to find the key stats lines, so a play sheet would be a good thing to pull out, as well as a list of vehicle specific stats (just like the main WW2 version).  There are also extensive army lists on his blog, which look generally excellent, based on my limited research into Cold War TO&Es.


There were four players on a 12x5ft table, each taking 500 points.  Pete had a 500 point Soviet MRR battlegroup with a platoon of infantry in BMP-2s and a troop of T-72s, while I used a Tank Regiment battlegroup with a troop of T-72s and a platoon of infantry in BMP-1Ps.  The opposition was Ian with a British armoured battlegroup including a troop of Chieftains and platoon of infantry in FV432s, while Mike took a West German Panzer battlegroup of two troops of Leopard 1s and a platoon of infantry in Marders.  The scenario was a meeting engagement, somewhere on the flank of a major Soviet armoured thrust deep into West Germany, during the summer of 1985 - ah yes, I remember it well, the Summer of 85 that is, not a Soviet attack on West Germany.  NATO won the initiative roll.


Both the Brits and West Germans advanced onto the board, both rushing infantry forward to secure the small villages closest to their board edges.  Mike's Leo 1s advanced strung out in lines towards the back of his table edge, while Ian's Chieftains were similarly deployed.  I don't have too much information on how Pete's MRR and Ian's Chieftains fared, but my T-72 troop deployed in the village to my left, skulking in the cover of the buildings, while my BMPs advanced into woods to my front and left.  My recce BRDM-2 and mortar spotter took up an observation position iin the woods and my CO took up observation positions in the central woods.  A BRDM-3 also skulked near buildings.


Mike's idea to blaze away at my T-72s in the village and command BMP in the woods didn't work out, as he either couldn't spot me or couldn't hit me with his open fire orders.  My response was to loose some ineffective ATGM fire from the BRDM-3 and to snipe at his Leo 1s with the T-72s.  Most were also ineffective to hit, although the Leos were automatically spotted as they had fired.  However, my T-72s got one hit, which resulted in a fireball of exploding ammunition - scrath one Leo 1 (his CO as it turned out).  I also called in a battery of 2 Vasilisk mortars on the German held village, rolling 8 dice to hit with three kill hits and 5 pins the result.  This pinned most of the infantry as well as one of the Marders, but only resulted in 1 infantryman killed.


Next round, Mike moved the Leos around to get better shots, but with no more joy, although his battery of on table M106s scored some pins on my infantry in the woods.  The response was some devastating T-72 shots, killing 2 Leo 1s.  From his chits, Mike picked Gas, Gas, Gas, which hurt my infantry a lot as they suffered losses and failed morale, pinning them.


With the suppressed commands, the next turn was fairly ineffective, although my T-72s managed another kill on a Leo, but Mike hit my command BMP, knocking it out with all three passengers killed (3 chits at once).  One of these was a Beyond the Call of Duty test, which my T-72 passed and shot up another Leo, leaving just one runner.  Mike picked another Gas chit!  When required, he rolled an All Clear result, so we agreed this meant both the first and second chits ceased at the end of the pair of turns.  I used the lull caused by some low command roles, partly due to Mike drawing the electronic warfare chit and deciding to reduce my command dice roll by 50%, to put my T-72s on reserve move.


Mike's turn saw him trying to shoot up my infantry from the village and to call in M106 fire, all to little effect.  By this time, I had a pair of Ian's Scorpions shooting at my infantry as well.  My T-72s used reserve move to advance to close range with his remaining Leo as well as the M106 battery.  When it came to my turn, the T-72s despatched the last Leo and an M106, pushing Mike beyond his breakpoint.


Pete was having a much more torrid time against the Brits, although he did for their command Chieftain.  When we called the game, Petes forces were around 5 points off breaking, while Ian and I had less than 10 points apiece, both through loosing our commanders, while Mike had in excess of 35 points of chits.  A fun game, I completely forgot about Battle Doctrine, which allows the Soviets to use Stahl and Urrah orders, which would have let me do more.  Not sure if Pete remembered or not.


On the whole, we had a great evening playing these rules, which are miles ahead of the nearest popular competitors.  One of the players and several onlookers were Cold War Warriors, who all said the game appeared to create a flavour of the period.  There may be some tweaks, but the system works well.


Some pics towards the end of the game.


Looking from Mike's (German table edge towards Petes forces in the distance.  All the Leos are destroyed, as is one of the M113s.


My BMPs and infantry in the woods with a Shilka for air cover.

Whats left of one of my infantry sections after repeated shots from German infantry and British Scorpions.

Pete's troops scattered over the table with a line of Chieftains on the right.


A good game.  One we are going to explore more fully in the coming weeks to get more familiar with the system and stats to see how it plays and identify any snags.


Thanks for looking.

Saturday, 3 February 2018

Hougamont 15mm Black Powder

I picked up a copy of Perfidious Albion Vol 2 in the New Year.  As it's been ages since we last did anything Napoleonic, Ian and I gave the Hougamont scenario from the BP supplement a try out.  We played through 8 turns, but ran out of models for reinforcements.  By that stage every French infantry figure that we possess was on the table, as well as almost all the British, just enough highlanders for a small brigade left (they would have had to represent the KGL and Guards), but sadly no Brunswickers yet.

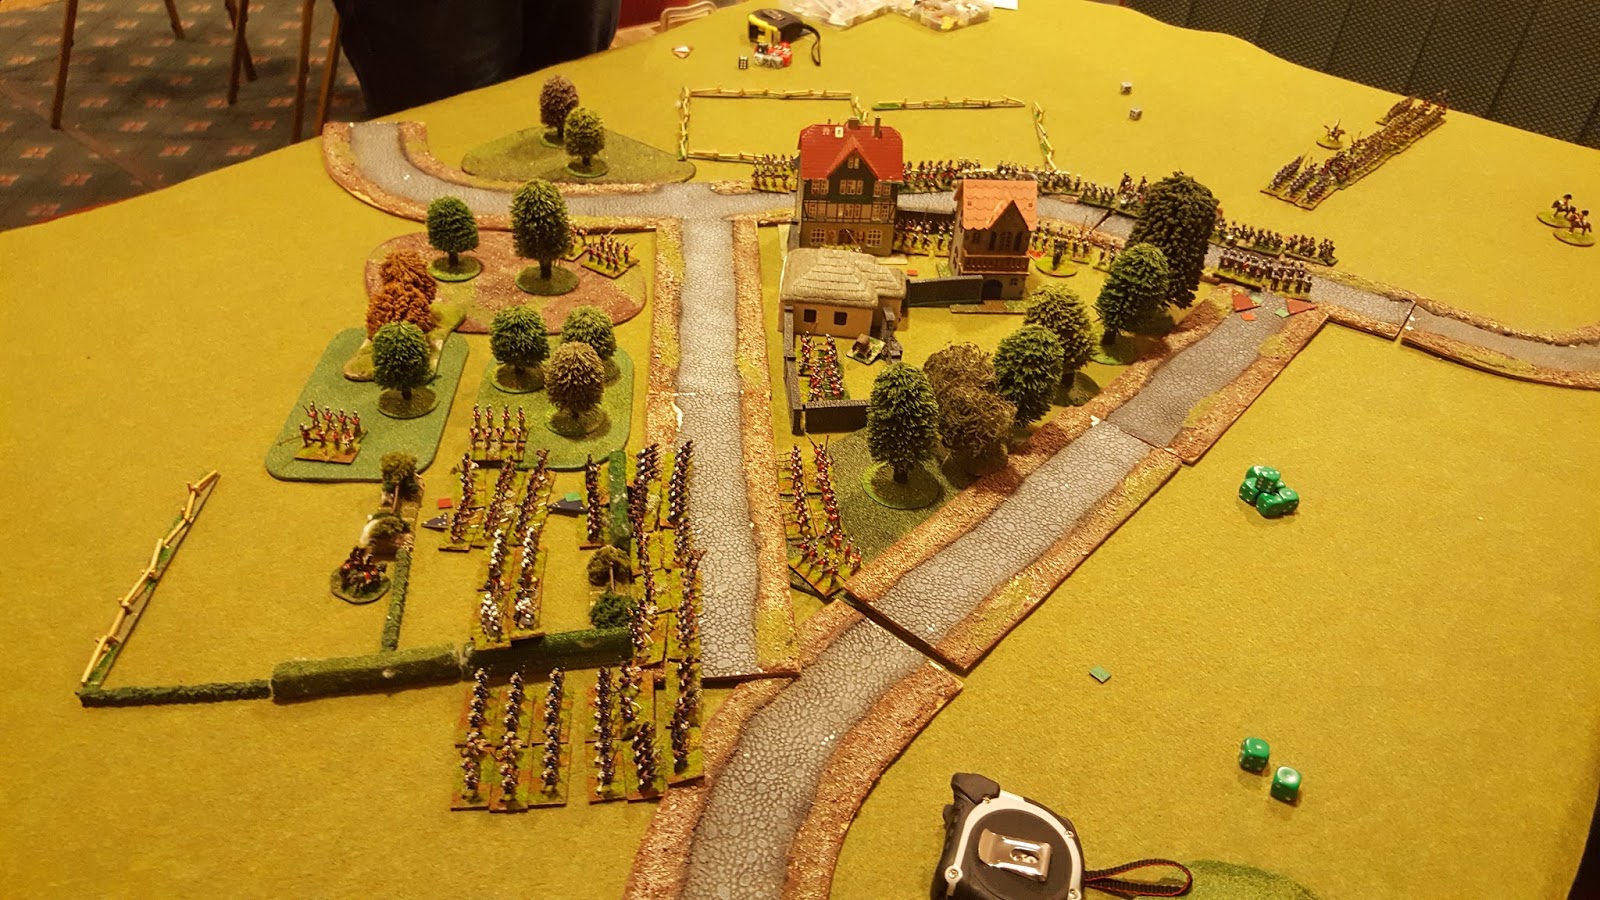
The photos below show the situation as we had to call a close.  The Allied defenders have withdrawn into the chateau, walled enclosure, orchards and formal gardens, although there are some scattered units retiring through the woods.  Opposite the chateau, lining the track, is Bauduin's brigade, with Tissot's brigade in the far distance swinging around to envelope Hougamont from the rear.  In the foreground, Soye's brigade is about to storm the orchard.


Soye's brigade, pretty much intact, although the left most battalions have taken some hits through flanking fire from tiny Nassau infantry batallions in the woods.  A distinct lack of firepower is a disadvantage for tiny units!


Bauduin's brigade facing up against a tiny unit of Nassauers in the chateau and a scratch unit of small Guards infantry batallions in the walled enclosure and orchards.  Bauduin's brigade has lost one battalion that turned and fled.


Bauduin's and Tissot's brigades, Tissot is inching around the angle of the orchard to come against the rear of Hougamont.  Not on table is a battalion of British Guards infantry in the orchard (we didn't put it on as it was the last turn).


Another view of Hougamont from the main British line.


We called it a draw.  The French had 4 turns left in which to take the chateau and felt they had a good chance to do it.  The Allies were nervous, but generally happy with their defensive line.  Tissot's brigade might have had a nasty shock when the final Allied reserves arrived, including a brigade of the KGL and a brigade of Brunswickers, coming on in 2 turns time.

All in all, a good scenario, probably needs a bit longer than an evening to play through to a conclusion.  We were happy with how the table looked, with nice sense of mass to the French brigades as they advanced.

Thanks for looking.